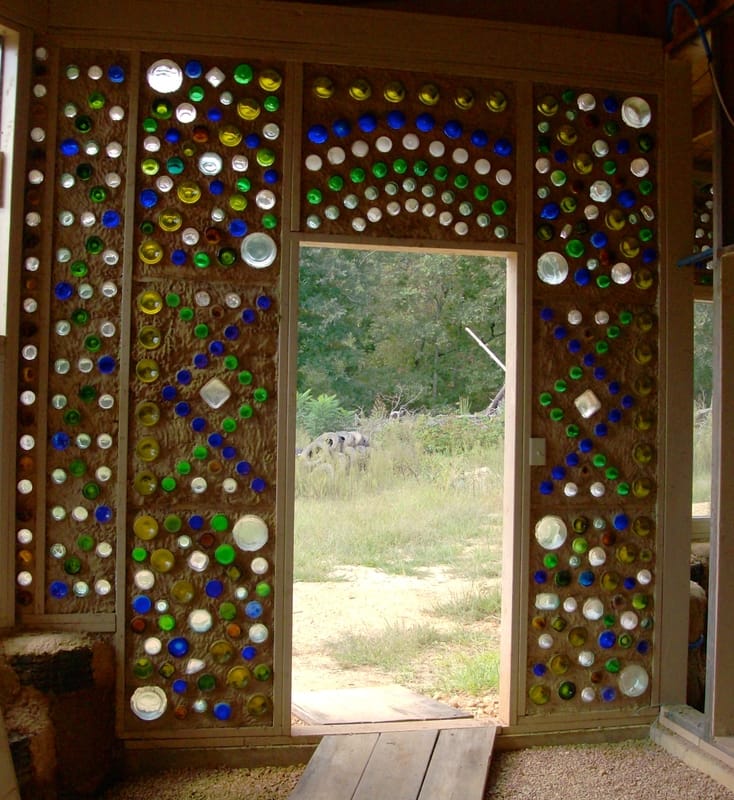
Kitchen WallWelcome to our kitchen or at least the space where a kitchen will come to be. Both these walls are constructed out of compacted water bottle bricks and a earthen cement. The wall doesn't touch the rafters. We left about a 1 inch gap. We will end up putting a trim board along the ceiling and wall to seal this and give it a finished look. 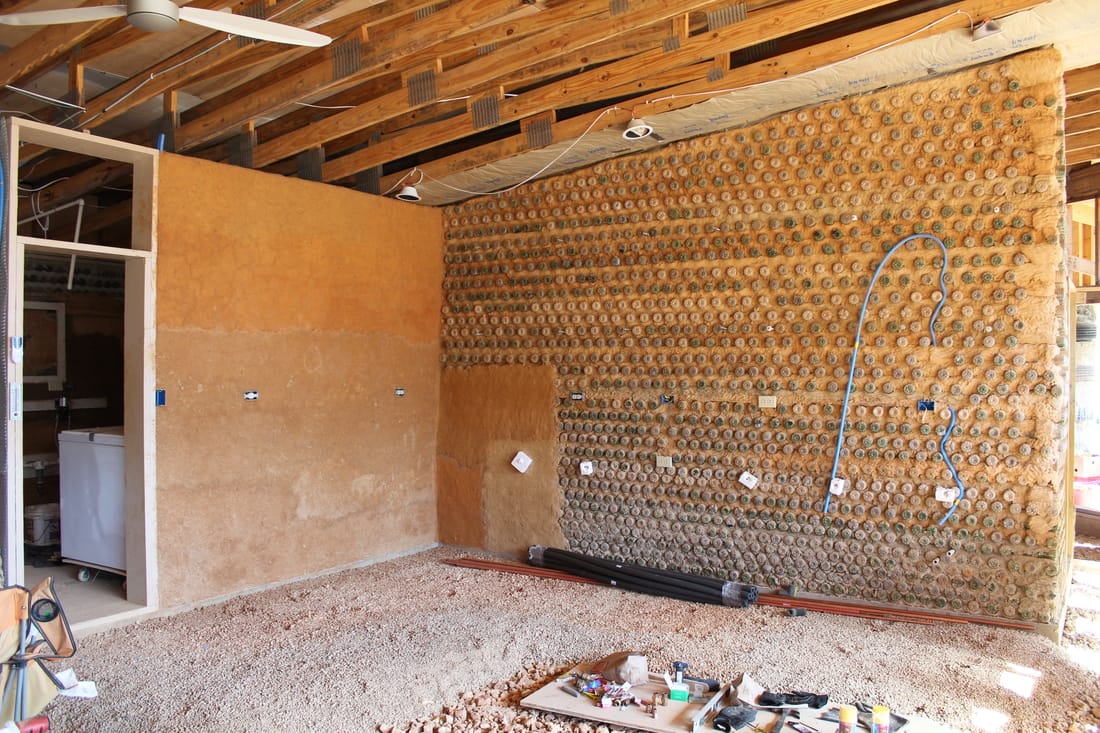 The first coat of mud packing material has been applied to both sides of the wall to the left. This is the same material that we used to mud pack the tires. We have noted though with this mixture if you don't add enough straw to it that it will crack. We do have some cracking that did appear but will be covered up with 2 more coats of a natural mud plaster. The other wall shows white blocks. This is foam to protect us from the metal bolts that are sticking out of the wall. We have a row of these bolts on the bottom and 2 rows on the top. We will be fastening a board to those bolts. This is what we will be fastening our kitchen and bathroom cabinets to. We did this because we don't know how well screwing the cabinets directly into the wall would work. Especially since cabinets are not light and will be holding a lot of weight. Would they hold with using the kind of material that we used? So to be sure that they will be safely secured the board will be in place for this. Again I am going to stress that thinking in advance for this kind of construcion is extremely necessary. Those bolts had to be mud plastered in as we built the wall. The same goes for the electrical. Which means we had to know exactly how high the cabinets are going to be the distance between the bottom and top cabinets in order to know where to put the bolts and the electrical outlet boxes. 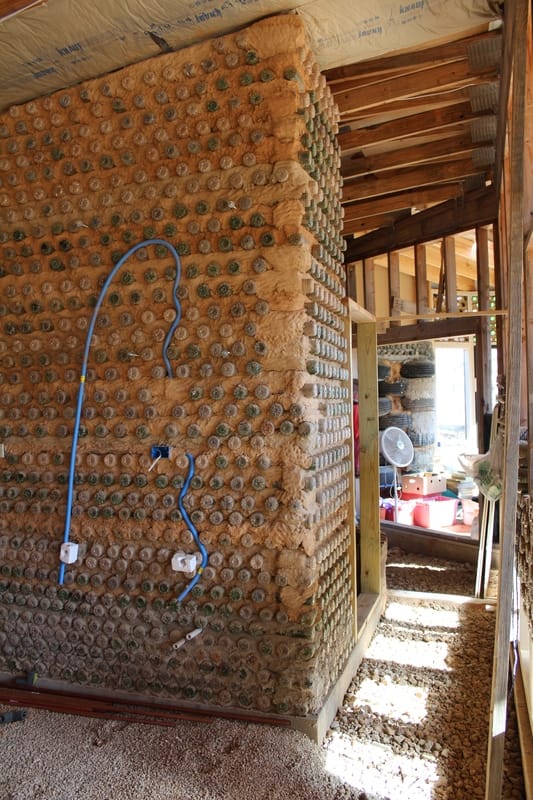 This is the corner of our kitchen wall and hallway that leads to the bathrooom and the master bedroom. The blue is conduit hooked up to the electric box. We will have bottom kitchen cabinets that will come out from the wall where you see the white pipes. In those cabinets will be a plugin on the end of it. so that is what the blue conduit is for the runs down the wall in a snake like fashion. The other one that goes up and is hanging will go to the ceiling for our ceiling lights that will hang over the kitchen sink and our dinning room table. The Start of our Bathroom The nice thing about building with dirt compacted plastic bottle walls is that you can use it to build a curved wall. Allen is starting the first row of our shower. The mud that Allen is using here is a bit stronger. We put extra cement and made it thicker by adding extra clay to it. Otherwise it is the same mixture as we use for the kitchen wall contrustion. This mud is similar to making a very thick mud pie. The reason for this is because it is the foundation for our shower wall. Because of the curve being difficult to make a wooden form for we decided to use dirt compacted gatorade bottles that were saved by Joanne Bailey of Willow Springs. With the size of these bottles it will take less rows and less bottles to construct this portion of the shower. As you see in the photo Allen is using a string tied to a metal stake to help in making a perfect curve for our shower. There is a mark on the string that Allen is using to put the edge of the bottles up to. 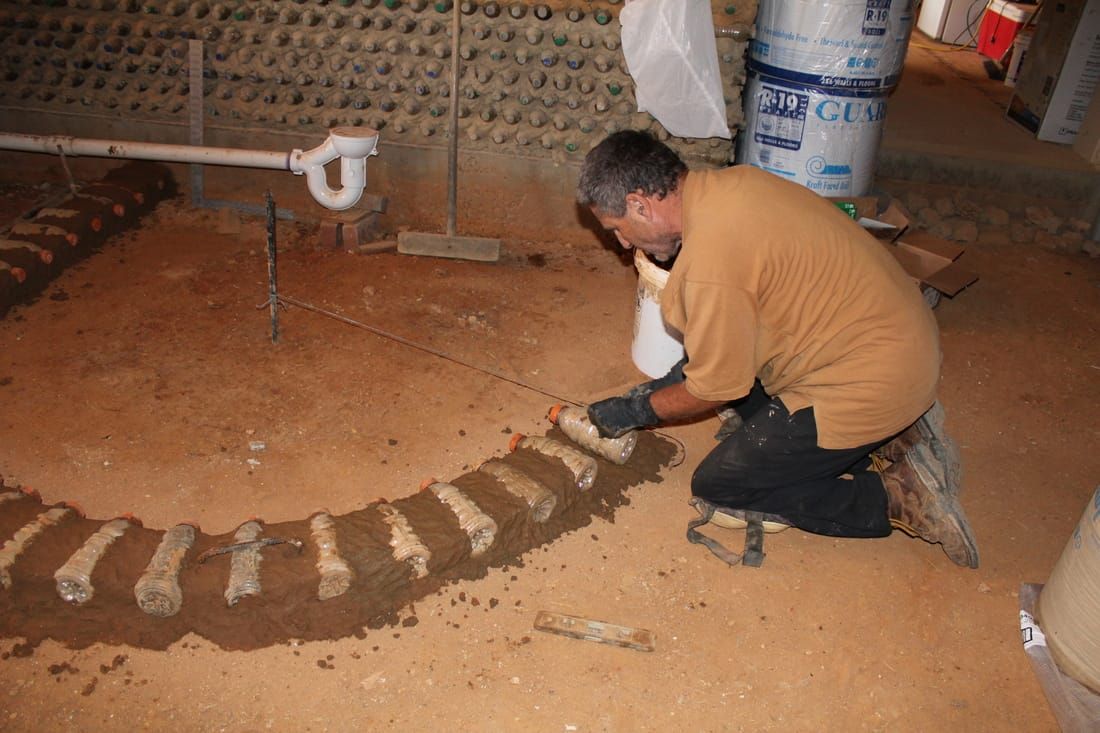 The next photo below is going from the kitchen with a little hallway to the bathroom. The wooden frame is the door way opening to the bathroom. You see we have another curved wall that connects to the poured footing of our bedroom doorway. Where the insulation is is where the frame work for the bedroom wall that will have our door with windows and another bottle wall section. It is safe to say that any place where we are not going to put a window will be filled with glass bottle windows. Truly making this home a work of art in every room. The drain pipes for the shower and the bathroom sink have all been laid. They were actually the first part of creating our bathroom space. We had to have this in place so we knew where our walls had to be built 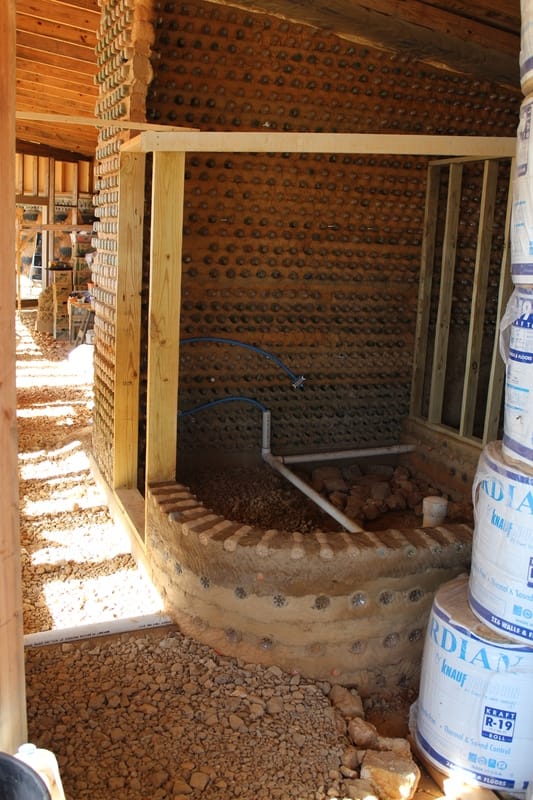 When we built that hallway wall to the bathroom door we didn't know how we were going to put in the door way. Or at least we weren't concerned about it at the time. Well we had to put a plan together to make it work. It helps to have a innovated husband that can make just about anything work. This is one skill that is necessary when building a Earthship with no actual building plans to go off of. Allen used self taping cement screws to screw the left side doorway into the bottle wall that was already constructed. Allen did drill a small hole prior into the earthen cement. Allen said that the earthen cement is hard and solid but not as hard as concrete is. The screws went in nicely and the frame work is fastened solidly. The wall on the right side of the doorway was put up after we put the door frame in. We used treated wood for this door frame. 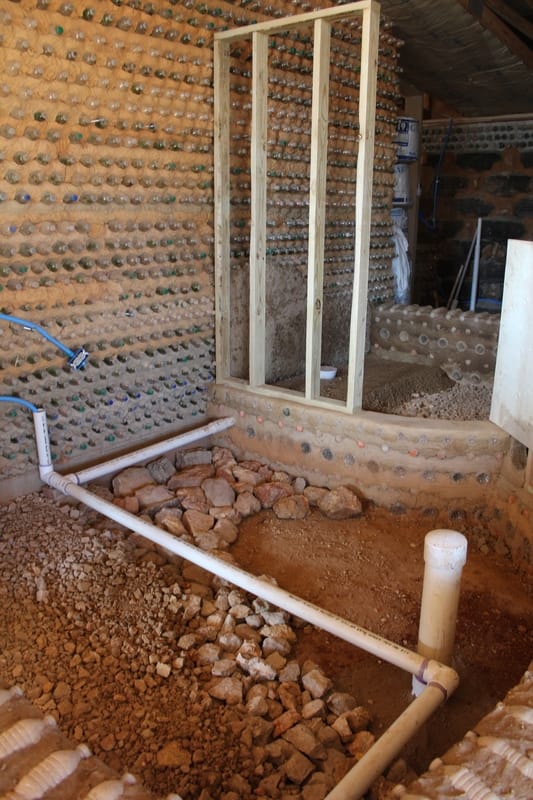 You can see the drain pipes for the shower and bathroom sink. The pipe with the cap on it is for the toilet. All of the pipes will be buried in the floor. As you see the beginning of the floor being laid with the rock. In every room we build we purposely wanted to raise up the floor to prevent water and moister from the ground so it would not come up through the finished floor. We start this by laying large rocks down first then they get smaller for each layer placed on top. All rocks are from on site. The smaller ones come from when we sift dirt to use in our earthen cement mixtures. The other frame work that is up is to install the pipes for our shower head and water controler. We wanted to use a wood frame so we could get to these pipes in the event we ever had to. This frame work was built with treated lumber as well. 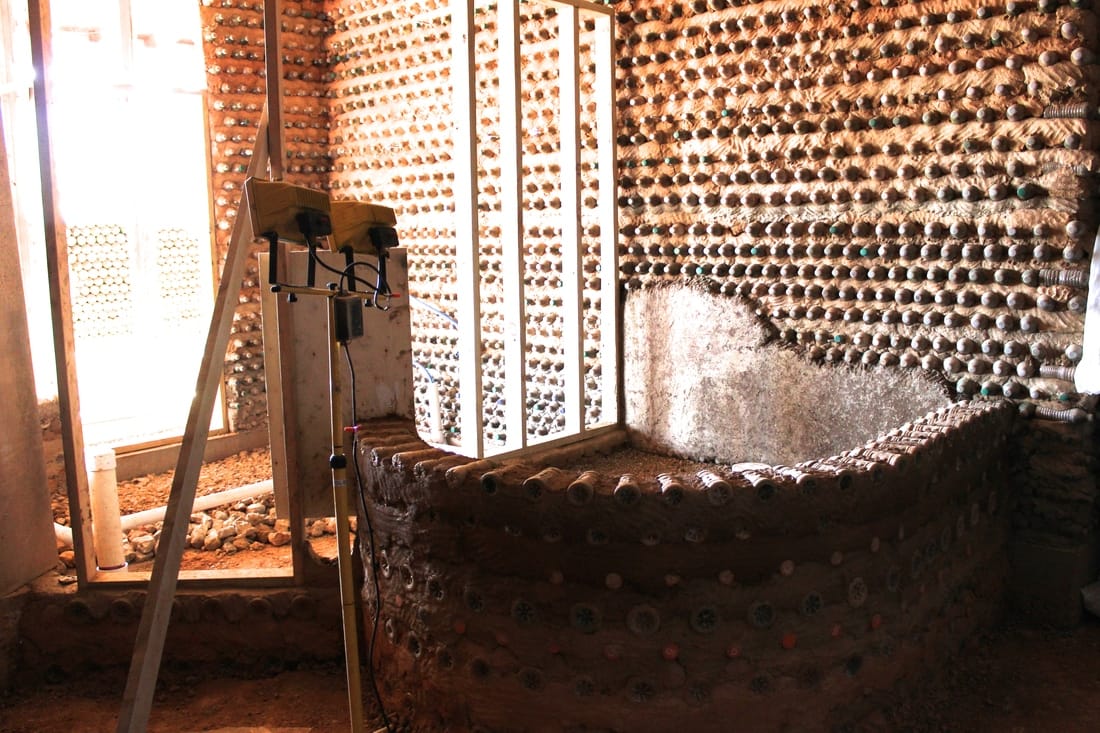 We have a doorway frame up from our bedroom into the bathroom. The shower wall is to the right of that. We have one more row of compacted bottle bricks to put up before we will finish this wall with glass bottle bricks. We didn't have enough gatorade bottles to finish this part of the wall with. So we then used the small gatorade bottles then the water bottles. You can use different size bottles as long as they are the same legnth. And you want to put the bigger ones on the bottom and move up with smaller ones on top. The floor of the bedroom will come up to the bottom of the door frame. 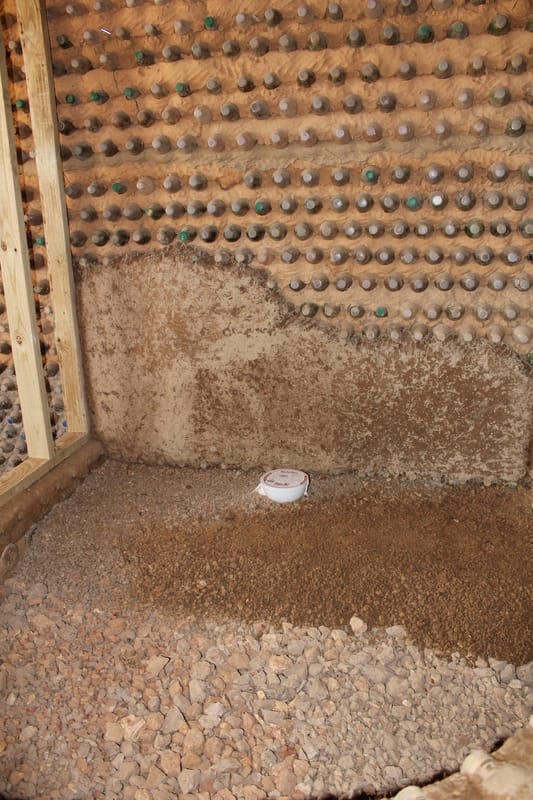 The floor in the shower has been started. The big rock is all covered with medium size rock and the small rock has been started. We have decided to tile the shower floor. The round white pipe is the shower drain. Part of the shower wall has been mud packed.
Please feel free to comment on this blog. If you have any questions that others may want to know the answer to please do ask. We have changed the settings for this blog now so we are getting notices of anyone commenting on the blog and will be happy to return any comments.
4 Comments
4/3/2017 05:33:29 am
Nice and quite informative post. I really look forward to your other posts.
Mary Severin
4/3/2017 11:45:34 am
Thank you for the wonderful comment. If you would like to get a email for when more articles are posted please click on The Be Notified link at the top of the page and we will add your contact information to our address book. Thank you so much for delivering such lovely thought on kitchen and bathroom renovation. I would like to tell that whether it kitchen or bathroom, the walls should never be ignored. Because it is one of that part which not only supports the room, but also adds value to the room. And if anyone think that he can revamp his walls on his own, then he may be wrong. Because if does everything on his own, then the final result may be less effective. Hence, I think it is better to hire a renovator while going to give new life to the walls of kitchen and bathroom by smashing it completely. 10/23/2017 11:48:22 am
Awesome blog. I enjoyed reading your articles. This is truly a great read for me. I have bookmarked it and I am looking forward to reading new articles. Keep up the good work! Leave a Reply. |
AuthorMary Severin writes about her families embarkment on a learning adventure to build an Upcycled Home using Earthship Principals. To find out what these Principals are click on the Earthship Principals link above. 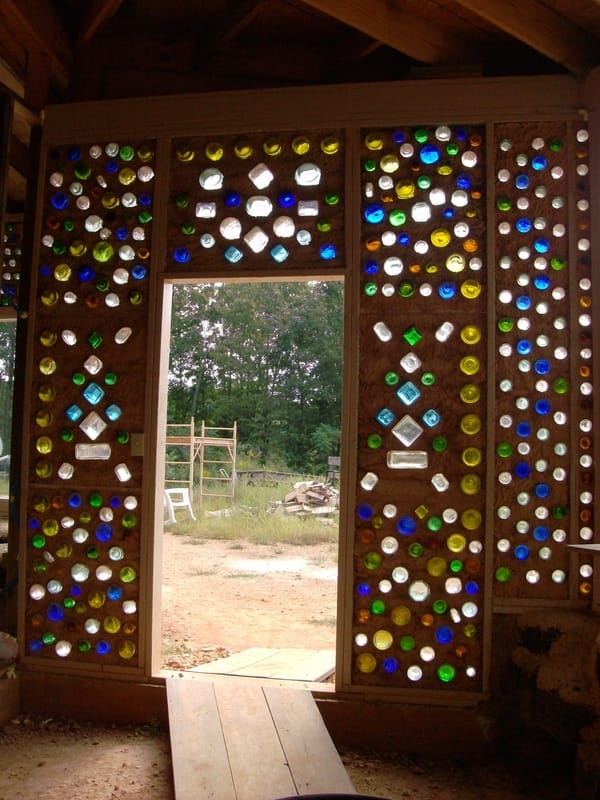

CategoriesArchives
March 2018
|
| Severins Upcycled Home |
|
