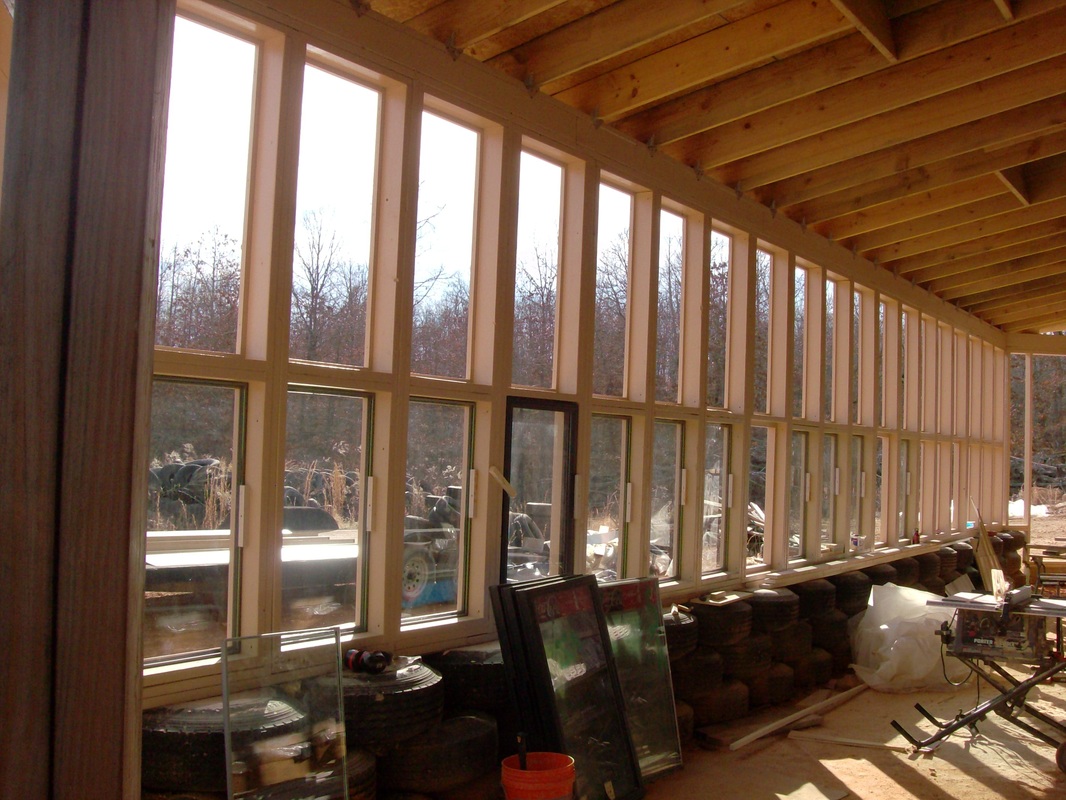
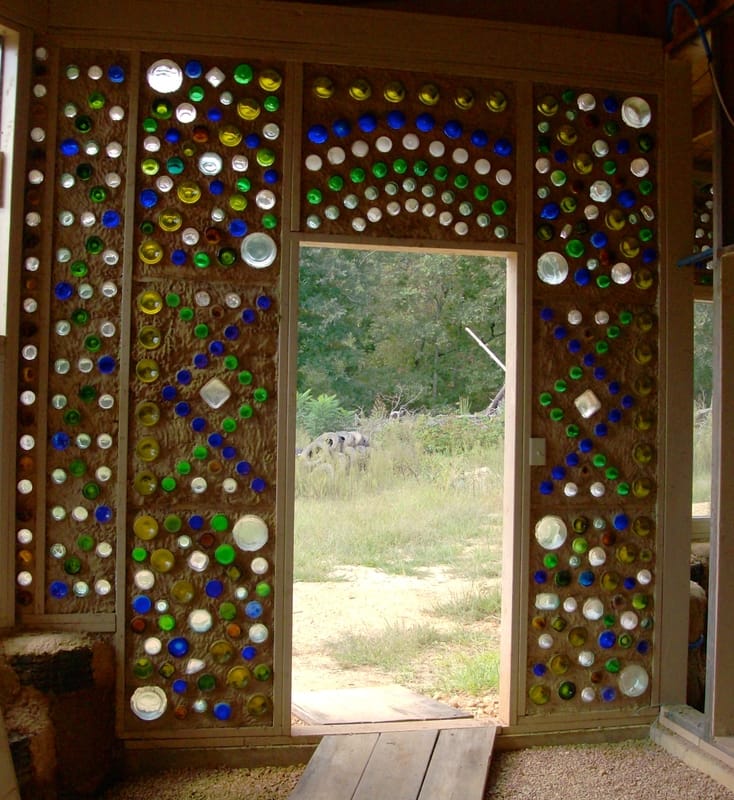
 It is really hard to tell from this angle. All of the stationary windows are in place in the front green house and in the east sunroom. I want to remind everyone that we did not purchase glass for these windows. We are reusing reclaimed glass from scrapped out Coca-Cola coolers. This glass is 3/4 inch think with tempered window on the outside and insulated. One challenge that we have found with using reclaimed glass. Even if the door size is exactly the same does not mean that the window pane that is within the door frame is the same size from window to window. We have found two different sizes of window in the same size door frame. We were not aware of this when we picked up the windows. With all of our framing now put up we are in a bit of a struggle to find enough that are the same size that will fit in our framing. If you are able to use reclaimed glass from Coca-Cola coolers and the glass is free pick up double what you need. Just in case you run into the same problem with different sized glass. Because of the glass being dirty we found many after they were cleaned up that the seal had broken. So this is another reason to pick up more than you need. FYI: We were not able to take the door frames off until we were ready to put them into the framing. Once out of the frame the windows are easily able to break. With the door intact they are incredibly strong. Because we did not have space in our pole barn we stored the windows out side with the tempered glass facing outward. 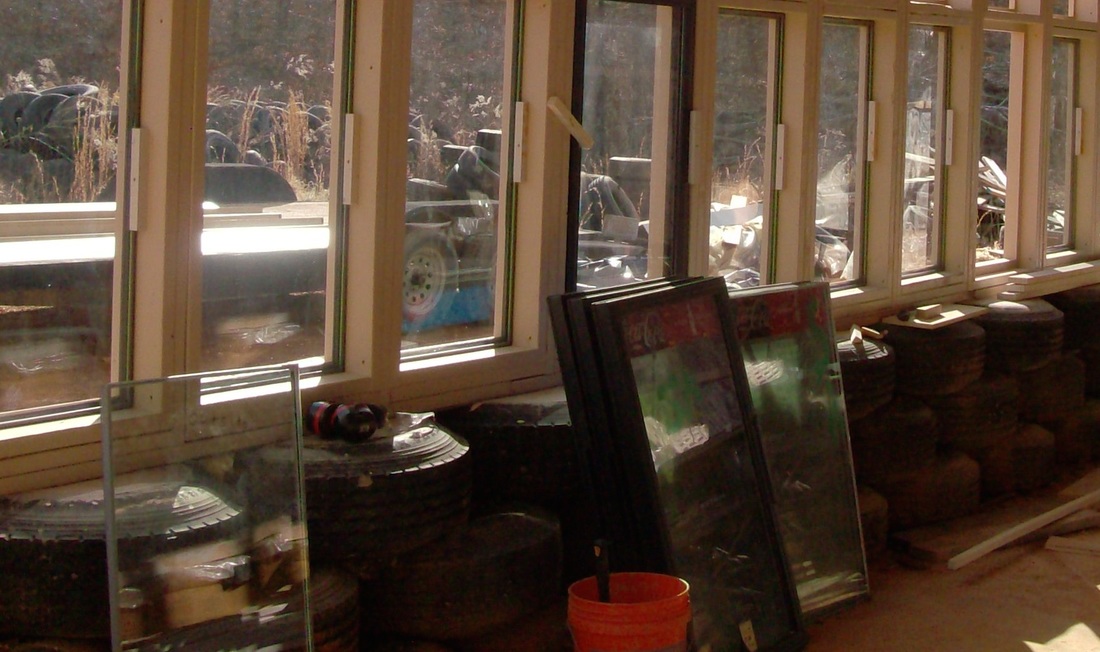 This photo shows the door within the frame and then when it is taken out. We have 4 windows that are in the greenhouse and 2 windows in the sunroom that will be opening windows. Allen hasn't had time yet to figure out how he is going to construct these windows. So at the moment they are sitting in the door frame in the spot where they will be going. This is why you see a window in a black door frame in with all the other windows that are in place. If you look in the above photo it is right in the middle. Getting Bottle Bricks Ready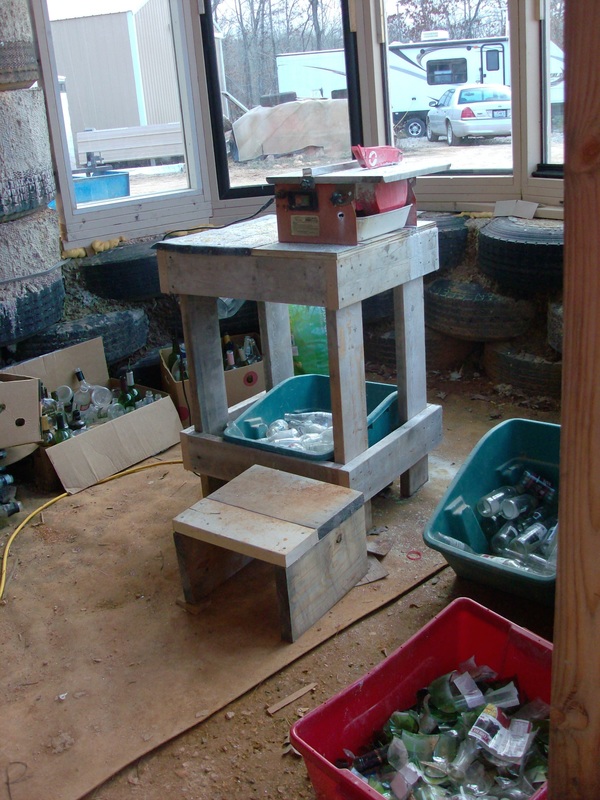 We set up the east sunroom as our bottle cutting station. We are using a wet tile saw to cut the bottles with. The water that is used with the saw keeps the glass cool as it is being cut. The glass does chip at the edges. But when two ends of the bottles are put together and taped it doesn't matter if the edges are chipped.  These are what glass bottle bricks look like. We put a lighter bottle with the brown and blue bottles because of how dark they are. This allows more light to come through the darker colors. 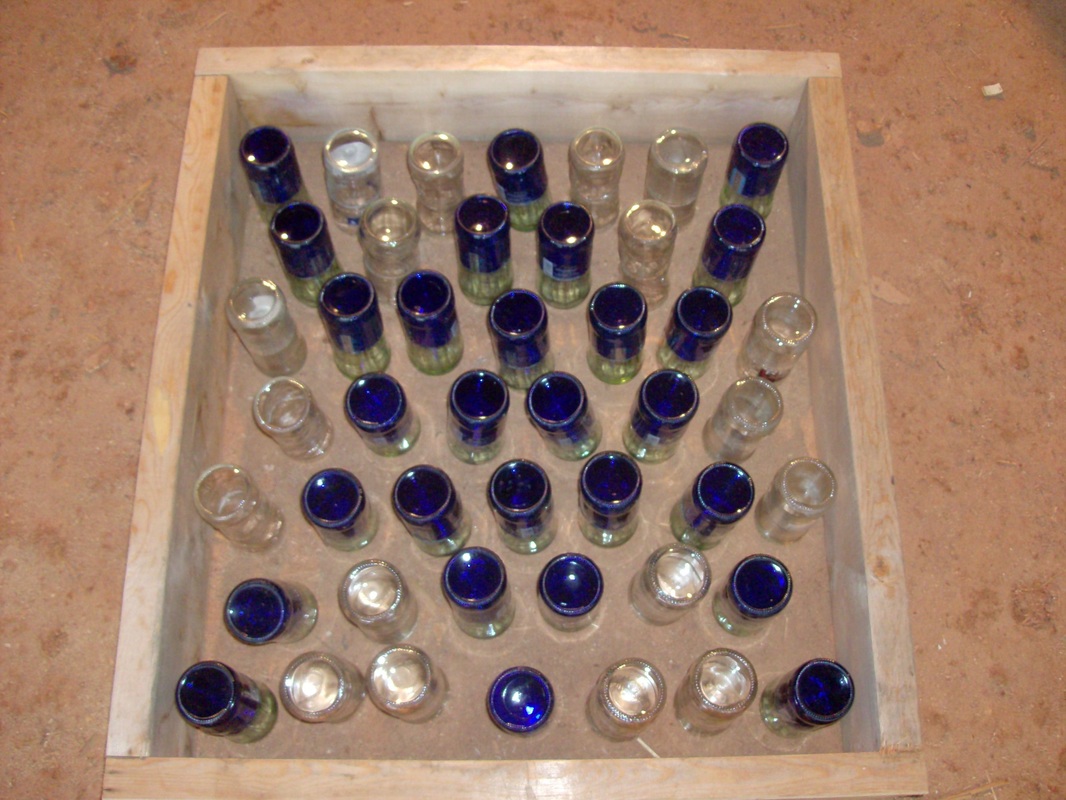 Allen made up a frame that is the same size as the framed in window. This allows us to create different designs with the bottles in the space that it will be going into. This step helps us to pre-determine what the window is going to look like and the pattern for each row of bottle bricks. We have decided on this pattern with the diamond in the middle. This design will carry the pattern through each of the 7 windows that it will be going into. We are going to have two windows that will be blue, brown and green with one window that will have a clear diamond with a colored background. The windows with the same color will be exactly opposite of each other with the clear design in the middle. 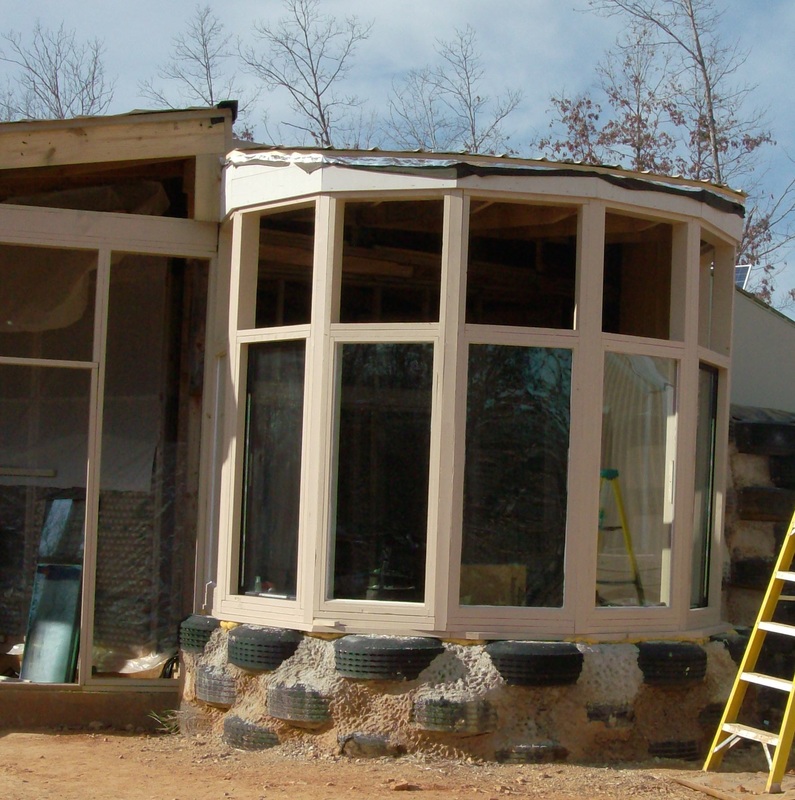 The open spaces above the tall windows is where the diamond bottle windows will be placed. We will be starting this As Soon As Possible. We are in the process of collecting the bottles and putting them together.
We are in need of blue, green and clear beer or soda bottles. We will be using 544 clear bottles, 232 of each green, brown and blue color. This will be a total of 1240 bottles for just the two sunrooms. This will be for 14 windows. We have yet to figure out the two entry way's where bottles will go around each exterior door. If you live in the West Plains area and have bottles that you are willing to donate, please give Allen or Mary Severin a call to arrange for a meeting or a visit out to the Earthship. 417-274-9885 A HUGE THANK YOU to everyone that has brought us bottles.
4 Comments
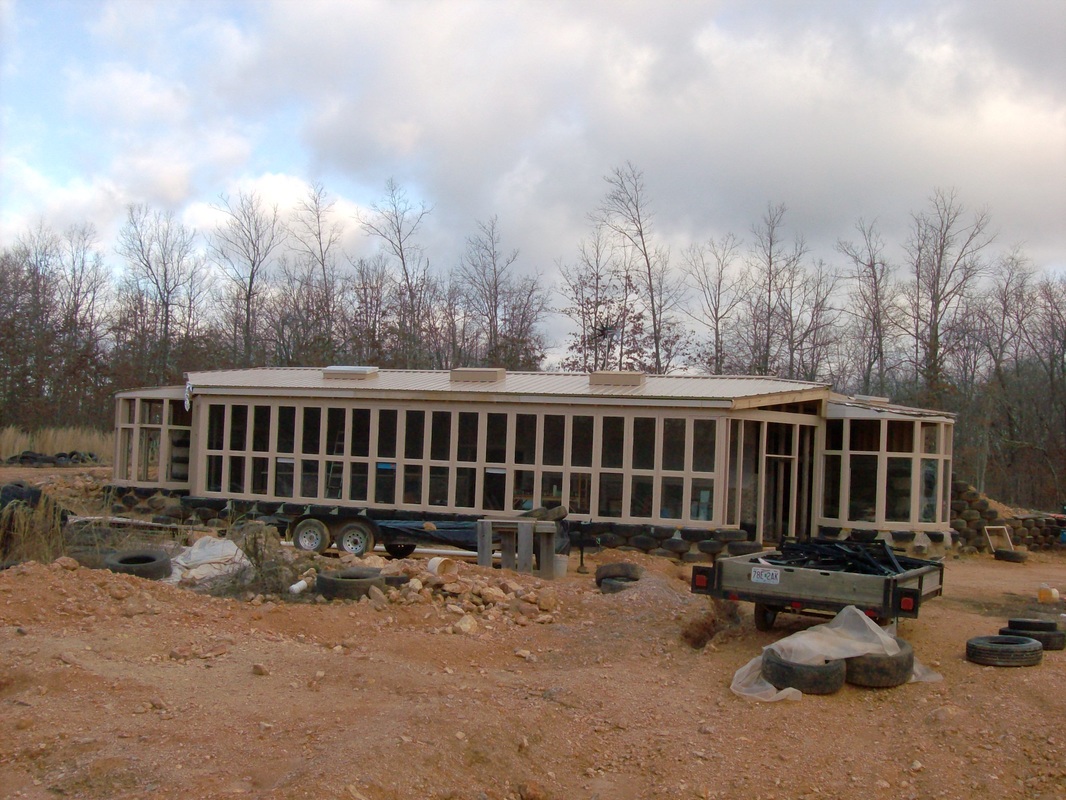
 The bottom of the greenhouse windows are all in place. There are 4 windows that will open. We have yet to design these windows. So they are just sitting in place for the time being.  The greenhouse is 10 feet wide and 53 feet long. There will be 3 planters located on each side of the front room door and all along the exterior windows. This will allow us to have a 4 foot walk way in the middle. 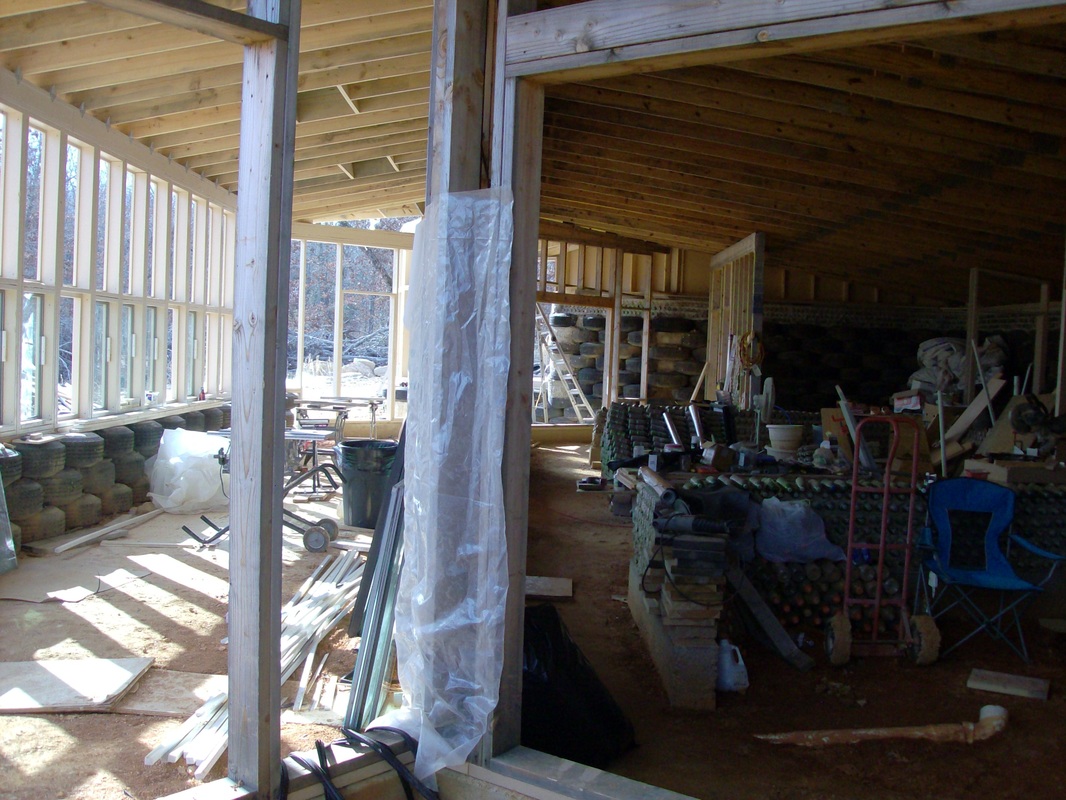 This is a view of the greenhouse and the interior part of the house. The door going into the house will be a sliding door and the other door going into the greenhouse will be a glass door. the open space between the two doors will be a glass bottle window.
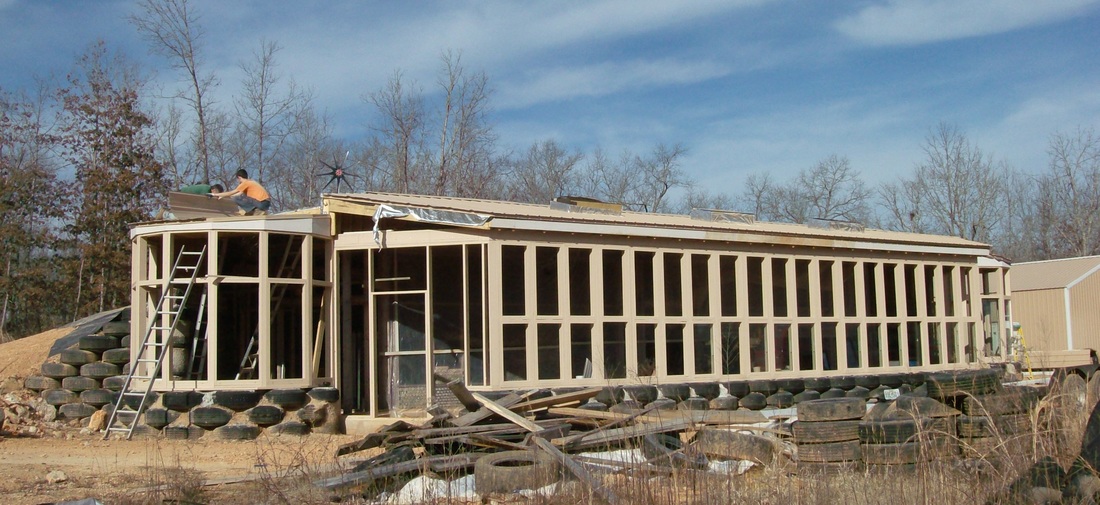 Allen and Arron finishing up the main part of the roof of the west side sunroom. 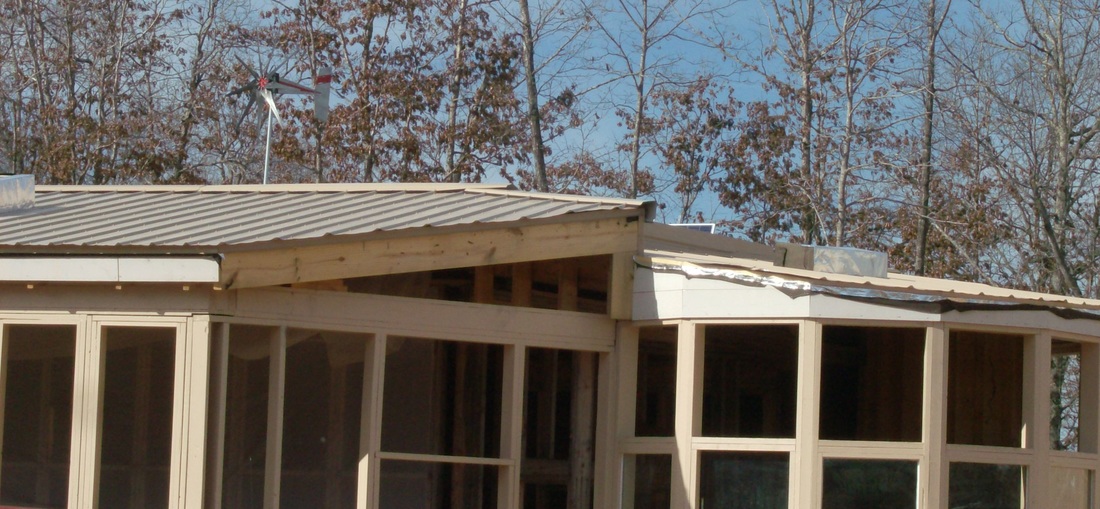 Each sunroom has a small skylight . That is what the silver thing sticking out of the roof is for.  This is the east sunroom that has the roof on it and 5 lower windows in. There are two windows yet to put in. We just have them temporarily setting in place. These windows will open from the inside. Allen has yet to design this and make it work. The upper spaces will be for glass bottle windows. We are planning on having a diamond design in different colors for those windows. 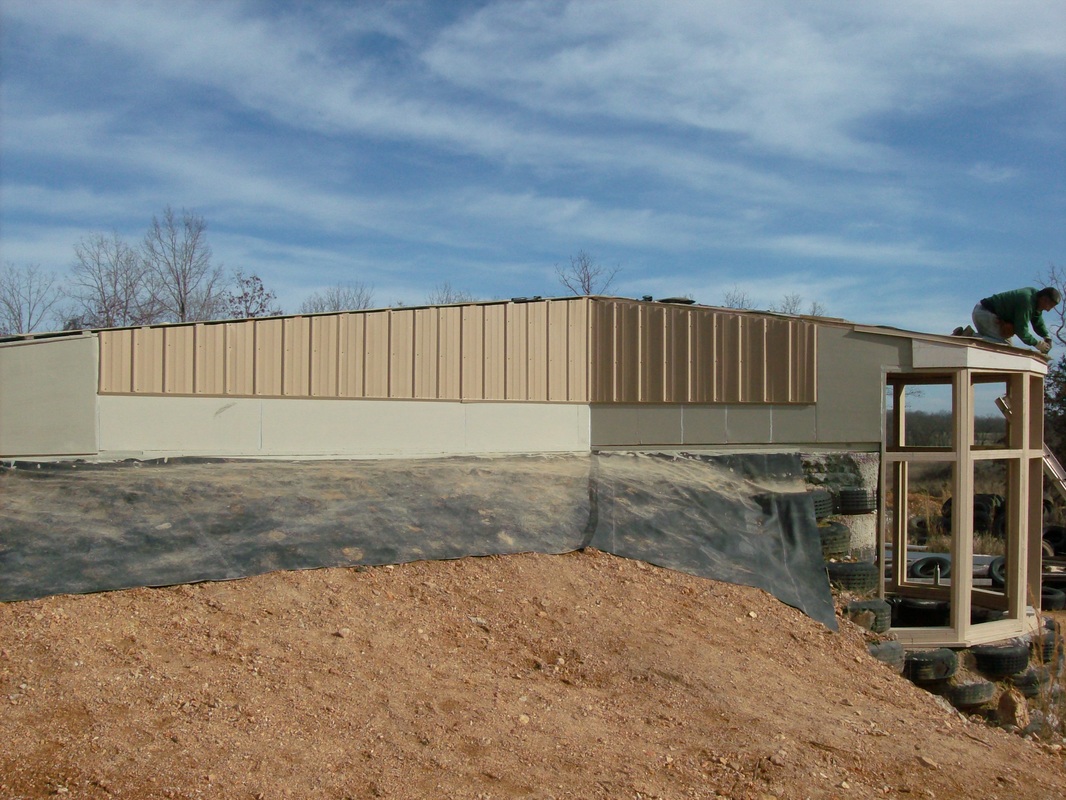 This is the west side of the earthship with metal on it. We will cover the EPDM rubber with more dirt that will go up to the bottom of the metal. 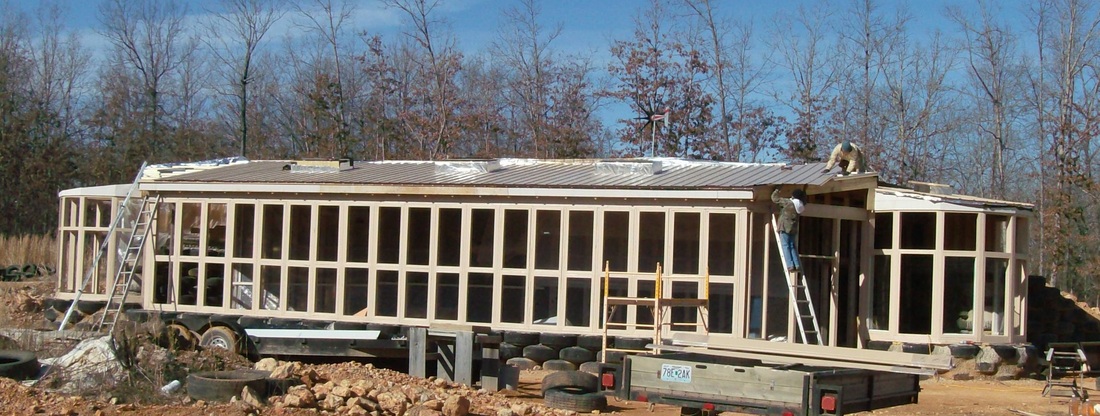 Our neighbor, Robert Jones has been a blessing. Robert is on the ladder helping Allen finish that corner of the green house. The 3 silver boxes that are on top of the main green house are the 3 skylight boxes that will open and allow the green house to vent out the air and humidity. The sun room sky lights will operate the same way.
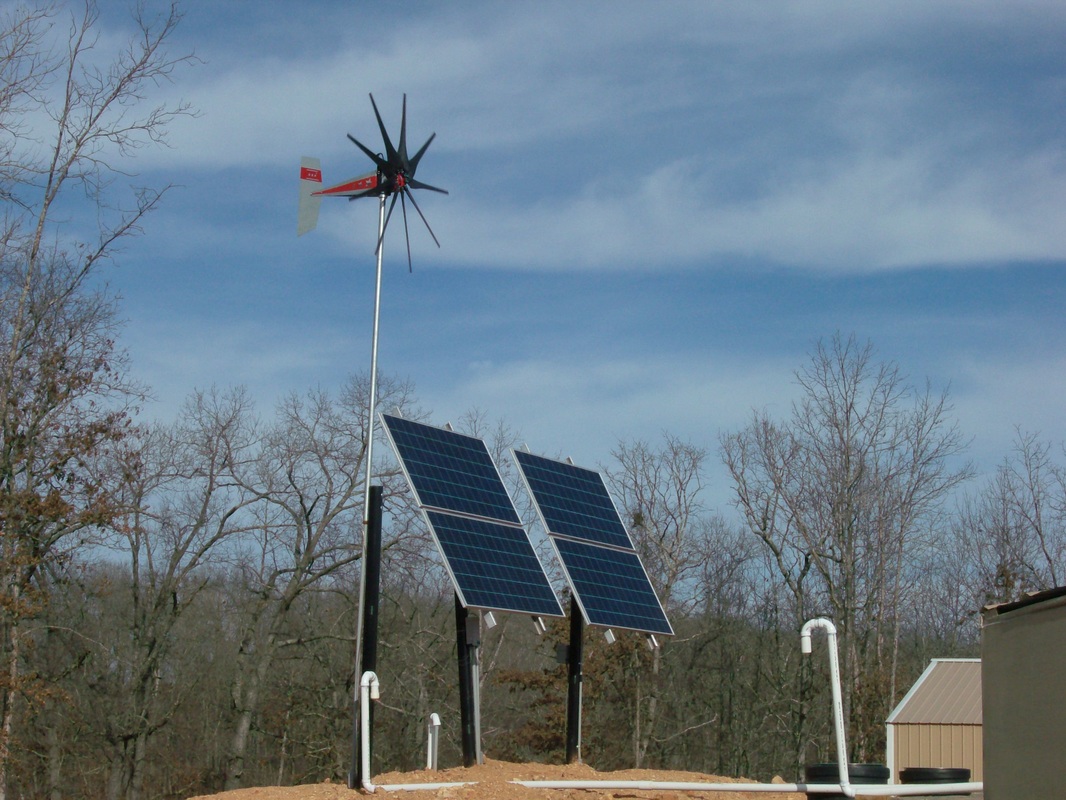 Solar system is now fully functioning. Each solar panel is 300 watts for a total of 1200 watts. The windmill can generate up to 1600 watts on a really windy day. This system will power a home using 2400 watts of power per day. This system is located behind our Earthship. Before we left Wisconsin we estimated that we would use 2400 watts of power with the lifestyle we were living. We had cut back on our lifestyle tremendously before we moved. We didn't use a microwave, dishwasher or dryer. To get the amount we estimated we used a meter that read the amount of energy that the device used in the time it was used for. Our Earthship will use only LED lighting. We will not use anything that has a heating element so no toaster, coffee pot, electric blankets, clothes dryer, etc. Heating elements draw energy out of the batteries extremely fast. It isn't worth the convince. I would rather hang my clothes out to dry on a clothes line and have the energy to watch a movie with my family. When figuring out your power usage my question to you is. Are you willing to go without a few things and adjust your lifestyle? If the answer is no then switching to solar will cost a bit more than you may want to pay for. Solar is like buying your power in advance. The better you take care of your system the longer your system will last. If you are willing to adjust your lifestyle. Then you can probably get away with a system that won't cost you $20,000 to $30,000. Instead it could cost around $10,000 just like ours did. 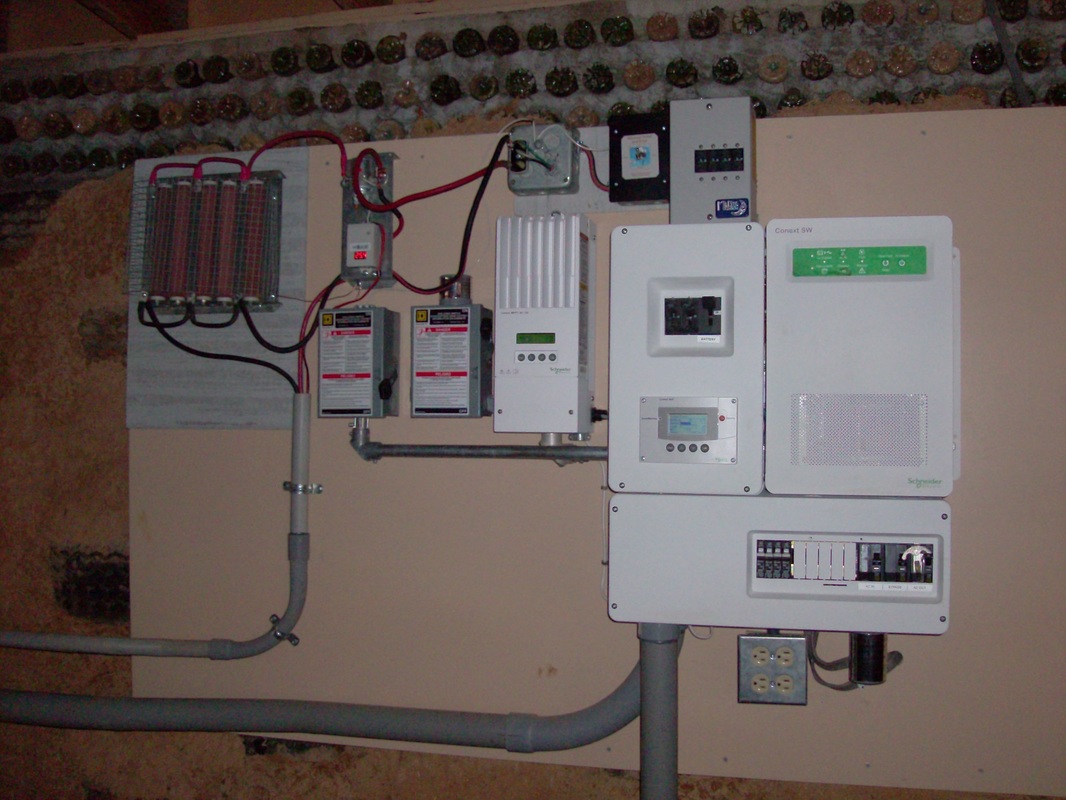 This is our solar system components located in the back hallway of our Earthship. This also includes the components for the windmill as well. A word of wisdom. If you have not gone to school or have not studied how to put together a solar system together you may want to hire it done. We had no clue how to put this system together. Check on credentials if you do decide to hire someone to put your system together for you. 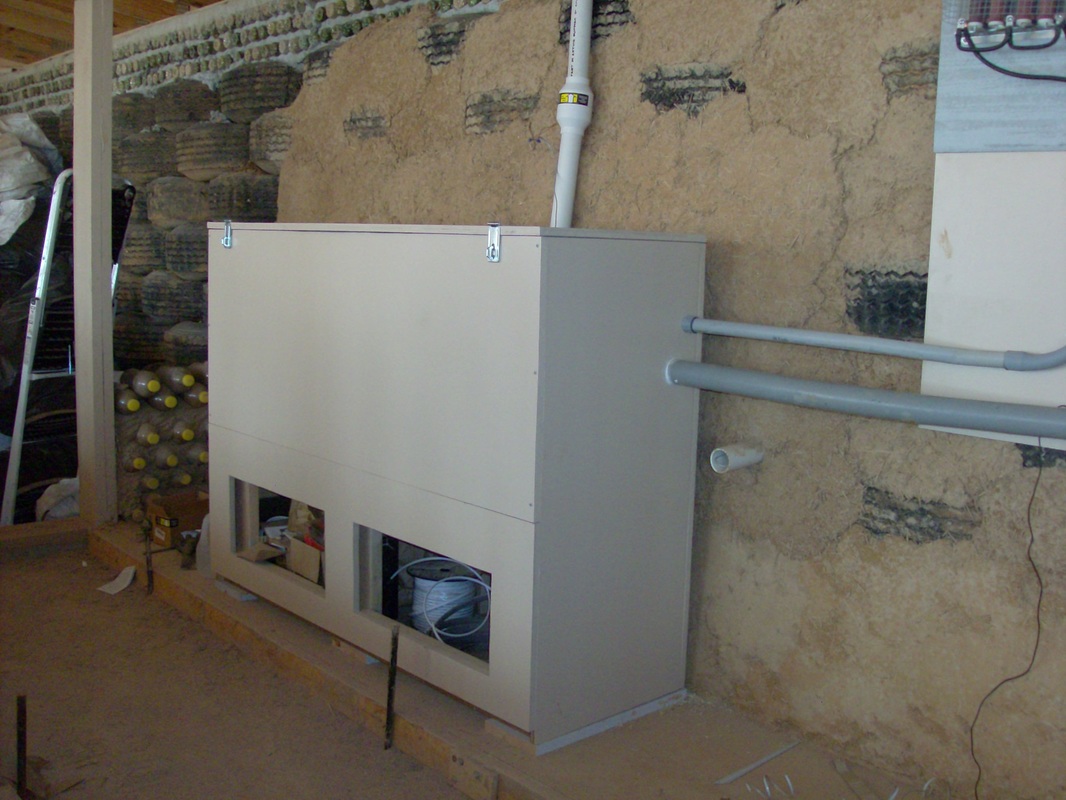 This is our battery box that stores 8 Trojan batteries. This is also located in our systems room. Most Earthships will put them on the roof in an insulated box. We had given this a lot of thought. We came to the understanding that batteries are sensitive to hot and cold temperatures. We were told if we can have them inside our home then we are better off for doing that. The batteries will last longer. It will not add thousands of pounds to the roof. And it makes it more convenient for checking on the batteries every month for water. They are there which will remind us to check them every now and then. The white pipe going up has a fan attached to it. This fan is to move any gasses inside the battery box up and out to an outside vent. Having the batteries towards the back of the Earthship is the closest place we can put them to our solar panels and windmill. The shorter the run for cable the more power that you will have. 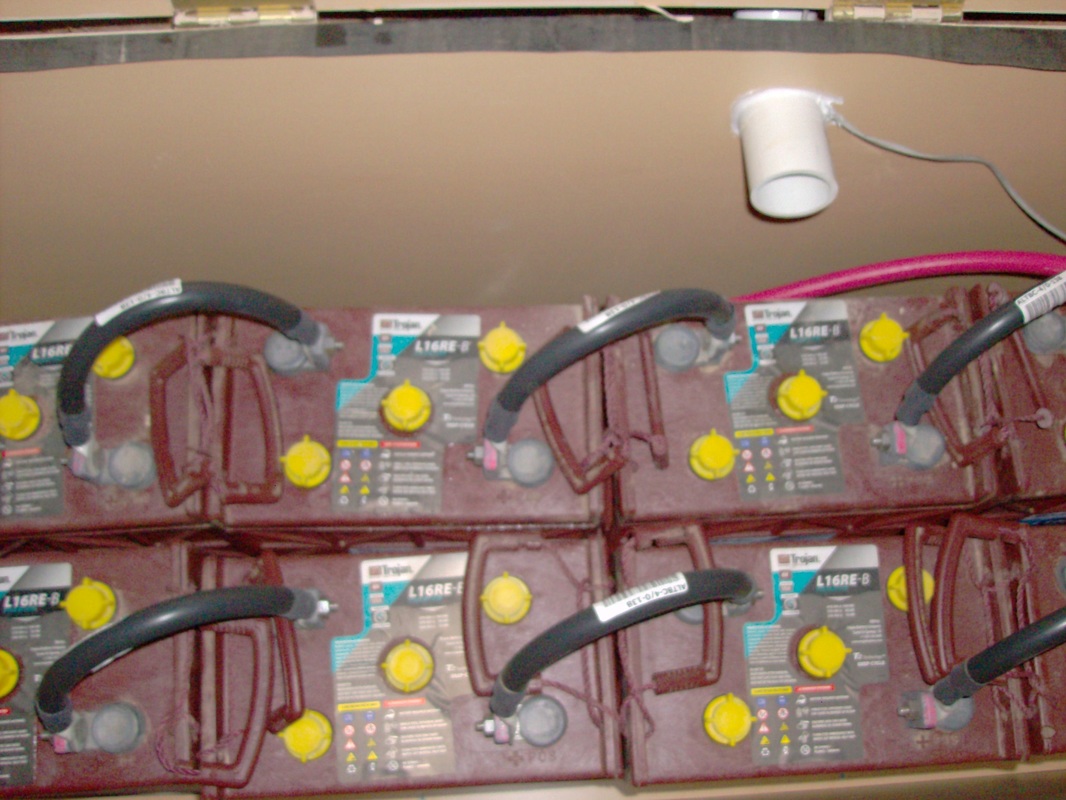 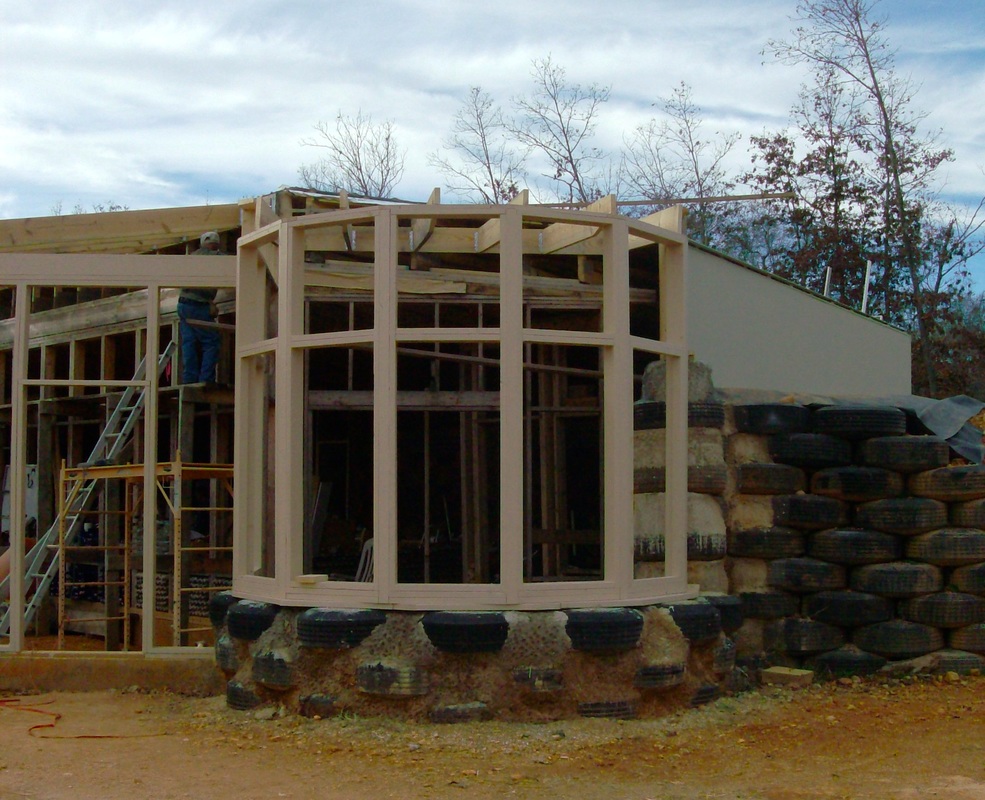 The octagon shaped sunroom took some advanced ingenious thinking on Allen's part to figure out. He never before made a round room with windows before. Next was putting up the rafters on the sunroom and connecting the main green house roof to the sunroom. This took the help of our neighbor Robert Jones to help us figure out how to do the angels. The bigger open space on the bottom are windows the smaller spaces on top will be bottle windows. There is a sunroom on each end of the EarthShip. There will be a roof vent for each sunroom. 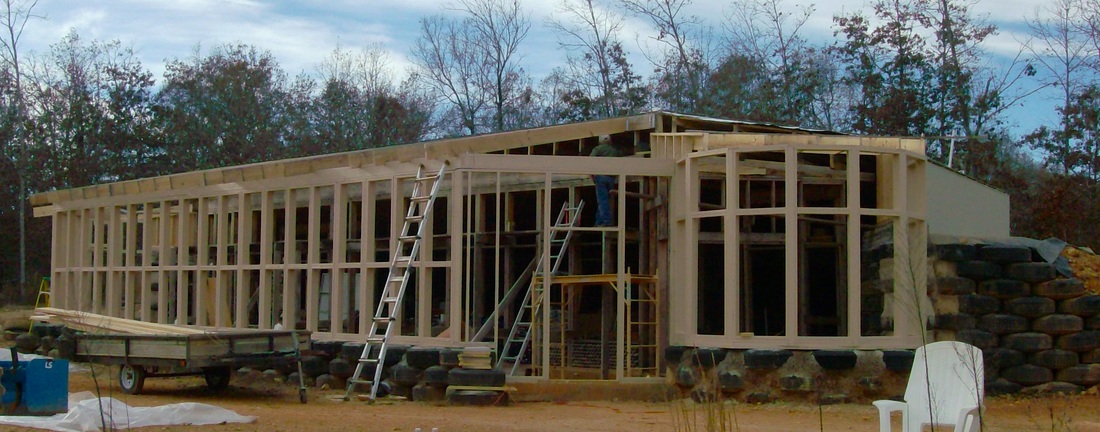 There is an exterior door on each end of the EarthShip. Around the door will be bottle walls. 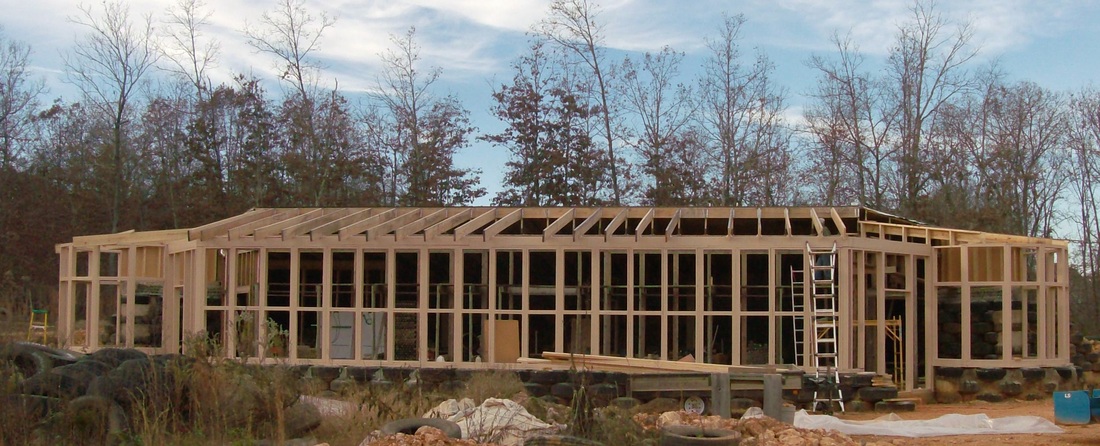 The spaces along the front of the EarthShip will be all windows. There will be 3 sky lights within the green house.
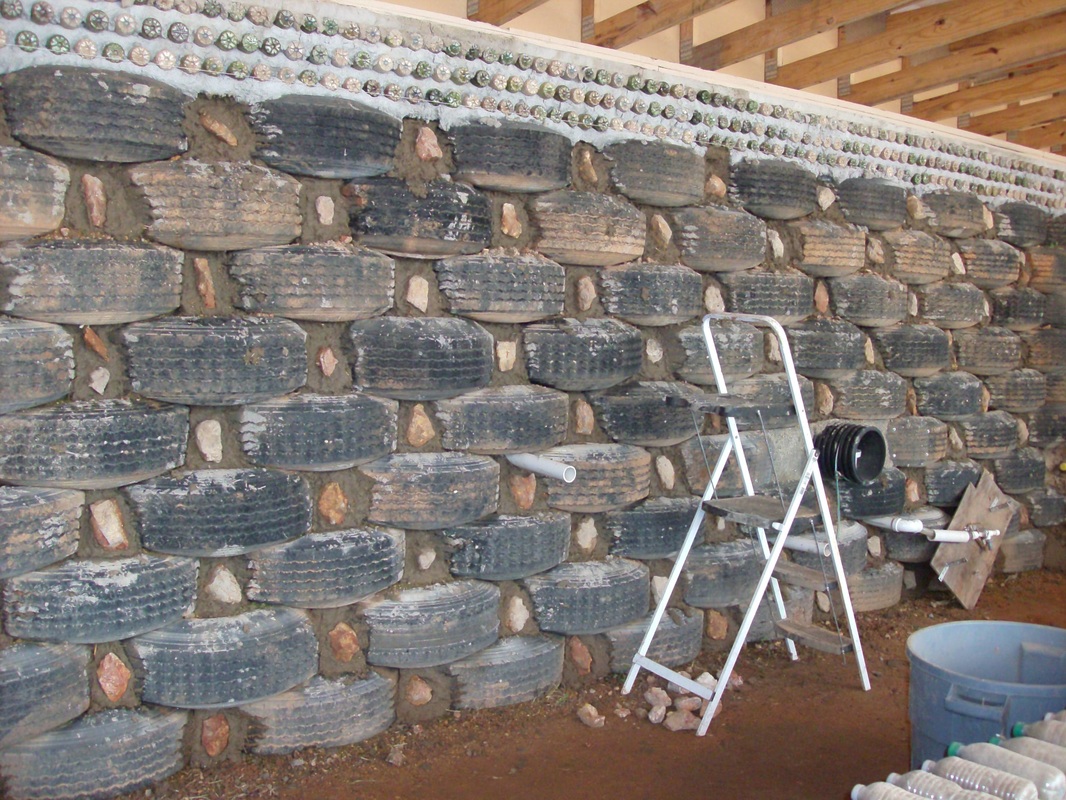 The first layer to mud packing in between the tires. We used a mixture of cement, clay, sand, straw, borax and water. The borax is to stop any mold or mildew from developing and to stop bugs from eating or digging into the mud. We have plenty of rocks on our property and they are thermal mass as well so we decided to put rocks in the mud instead of cans or bottles like Earthship does. We decided to start with this back hallway so we can work towards getting our solar system hooked up. Plus this is a good practice room. It won't be used like a living room is. And by the time we get to mudding the living rooms or our bed rooms we should be better at mudding the rooms. Not much science to doing this at the beginning. 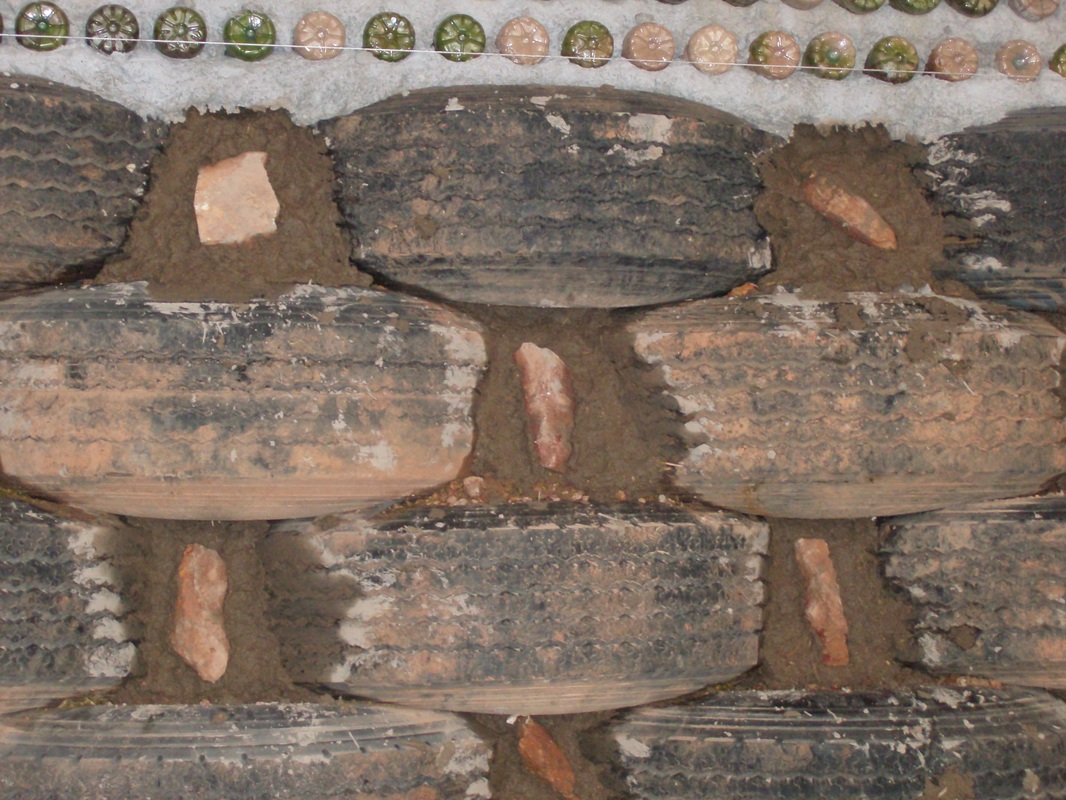 This is a close up photo. Always wet the tires and the area where you are putting mud. This will help the mud stick to it. 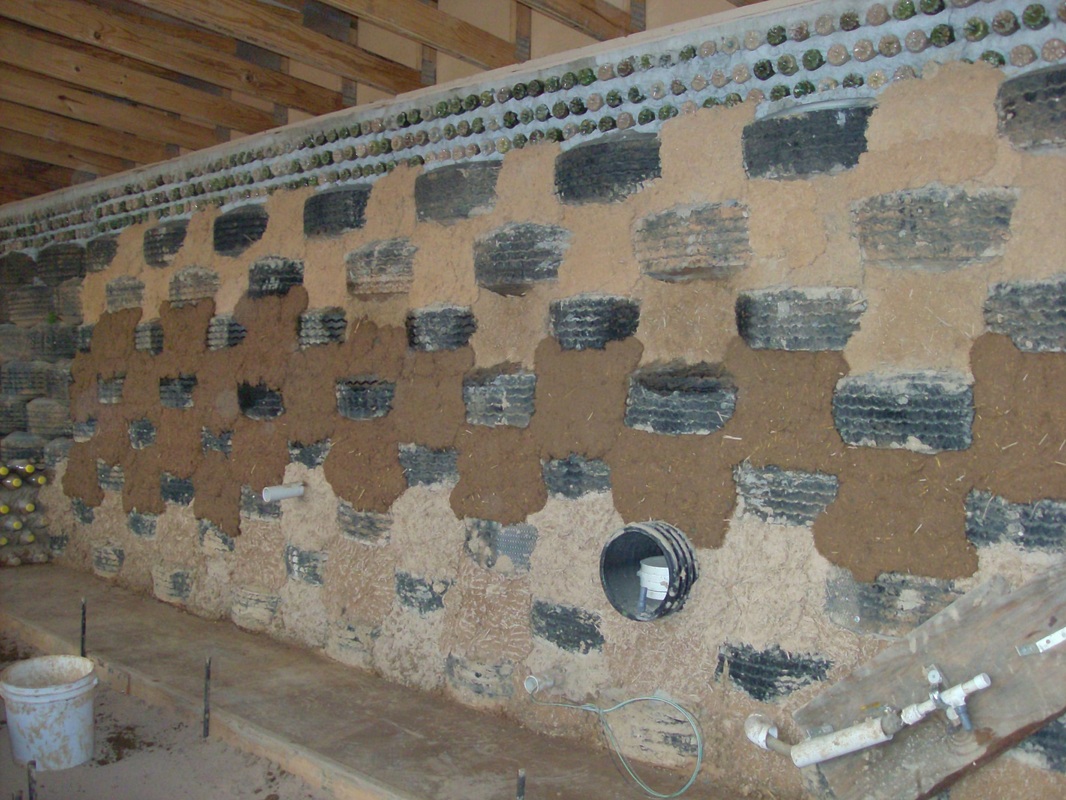 This is the 4th or 5th layer of mud. We lost track after mudding for a while. We have found to apply this mud mixture you have to slap it on the wall. The mixture is similar to cob. A little more wet than a cob mixture would normally be. We wet the area first then get a mud ball in your hand. Flatten it a little bit in your hand then slap it on. It creates a kind of sound that tells you that it will stick. You need that force to get it to stick really good. When this dries it is very solid. 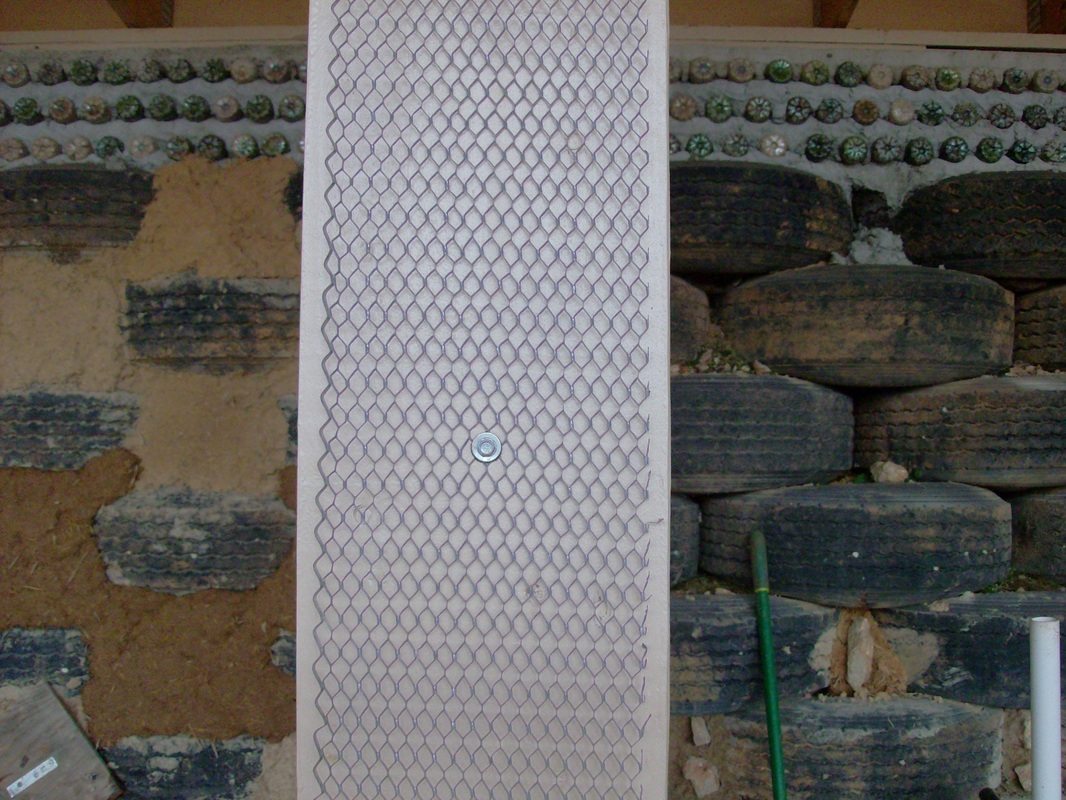 This gives you the idea of how far we have come with mudding the Systems Room. 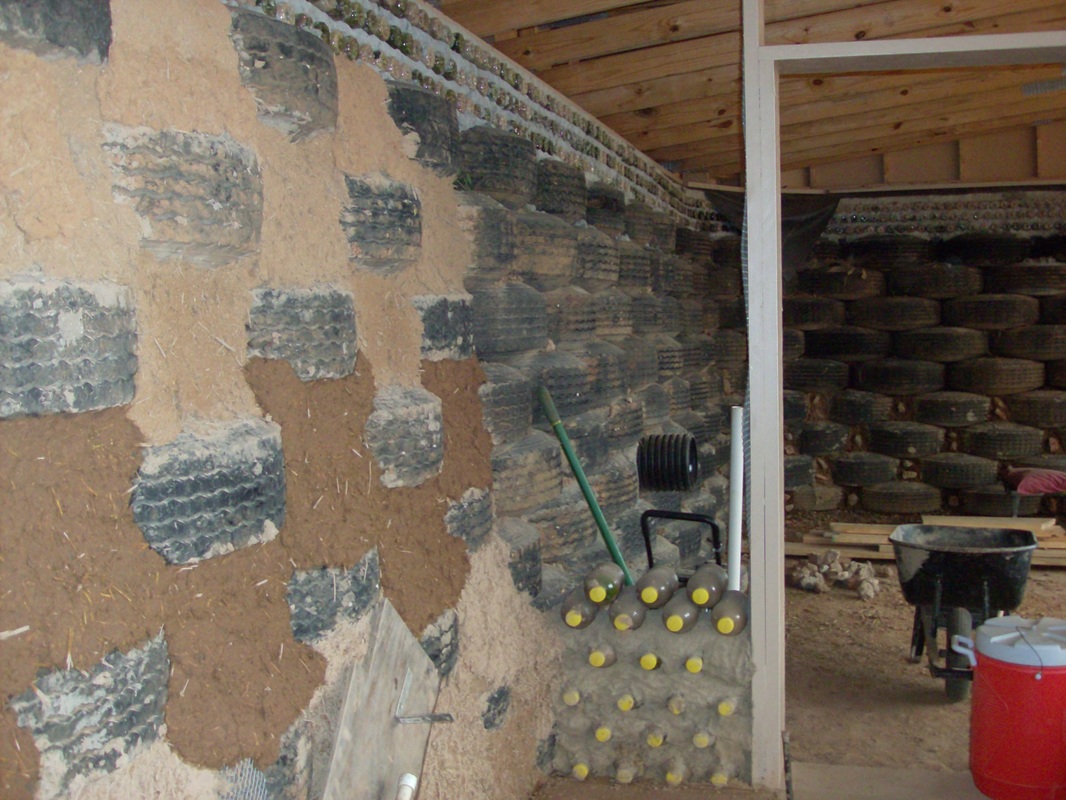 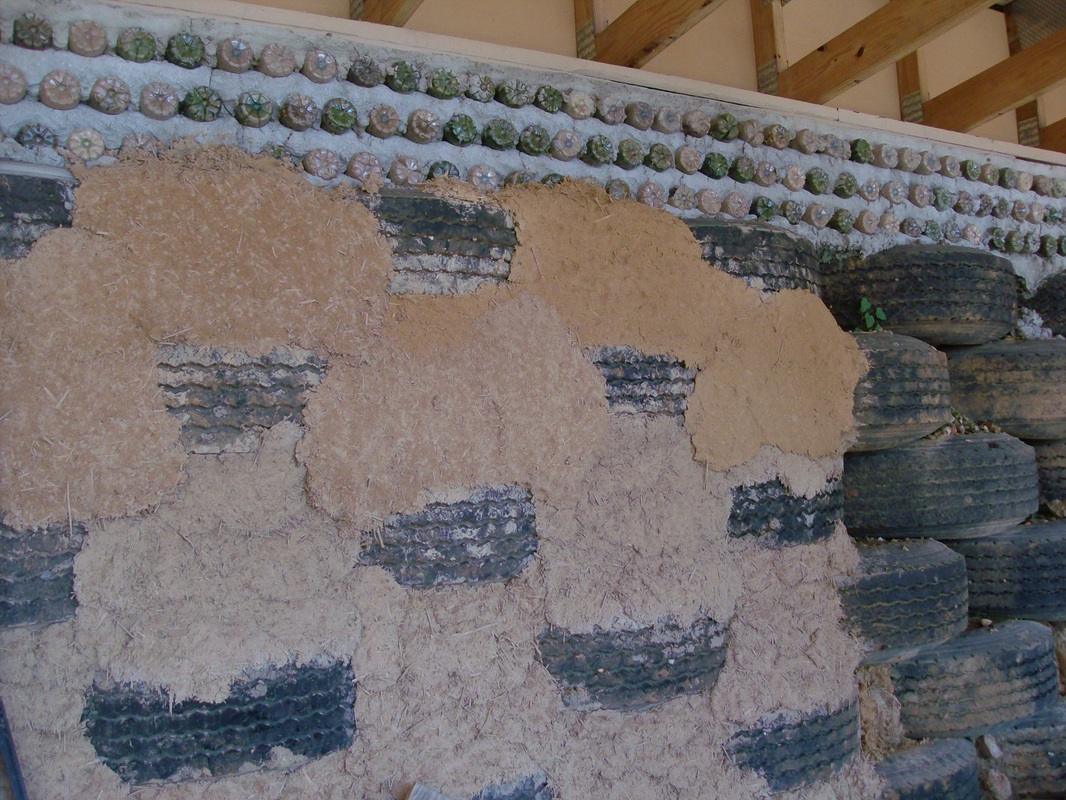 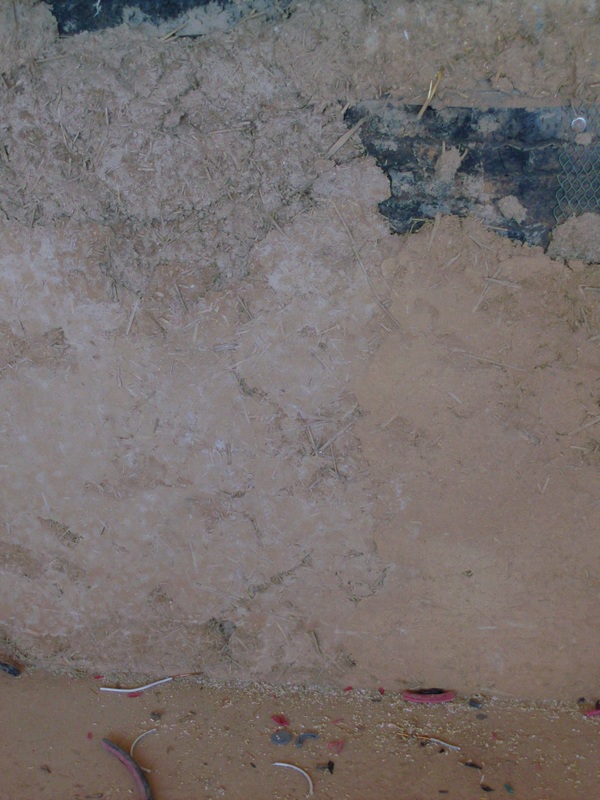 After about 6 layers the tires are finally gone.Load bearing walls with scaffolding on interior greenhouse. The scaffolding was to help put up the header and will be there for putting up the roof trusses. Interior compacted bottle walls with electrical starting to be constructed. Time for the roof trusses to go up. We used flooring trusses that are 2 feet high and was place 2 feet apart. A HUGE THANK YOU to our volunteers Jim, Corey, Hal, and Robert for helping us on the most hot and humid day ever. The trusses span about 28' and 11" and were all lifted up by hand. We used 3/4" plywood sheeting. We put tar paper up for a moister barrier then a radiant foil to reflect the heat back up.
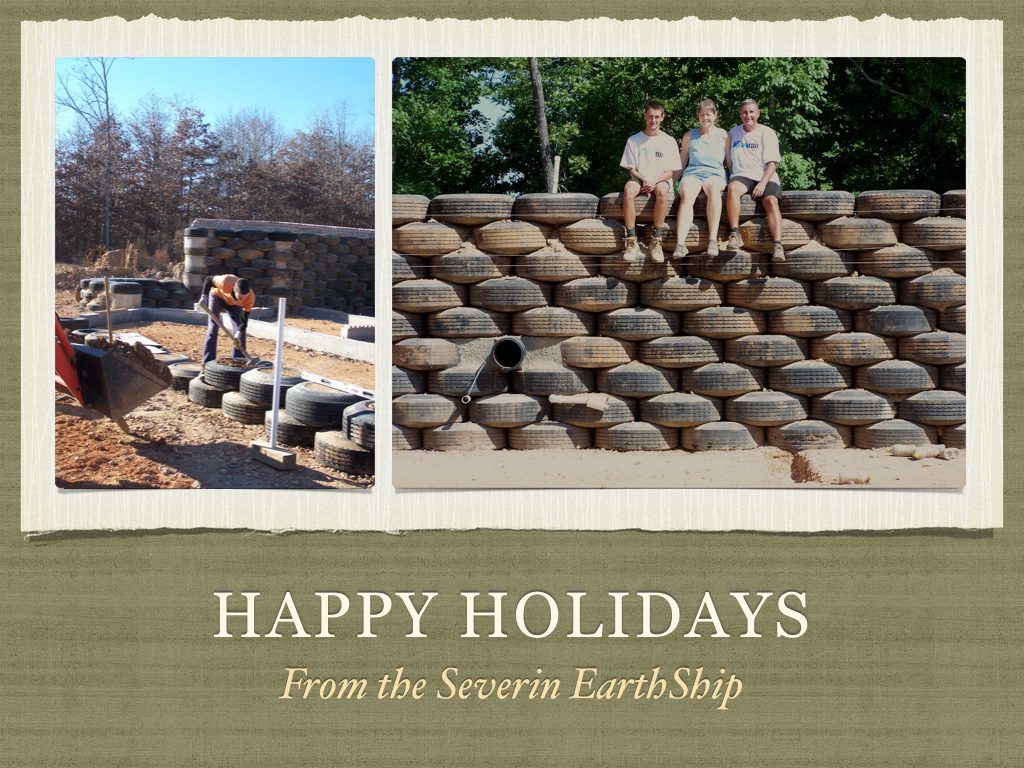
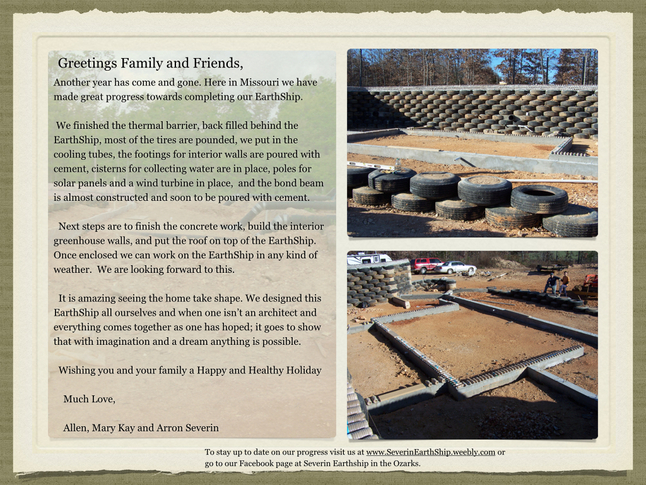
Even though it seems like things have been moving quite slow. We have progressed quite a bit this past fall and winter. GreenHouse Tires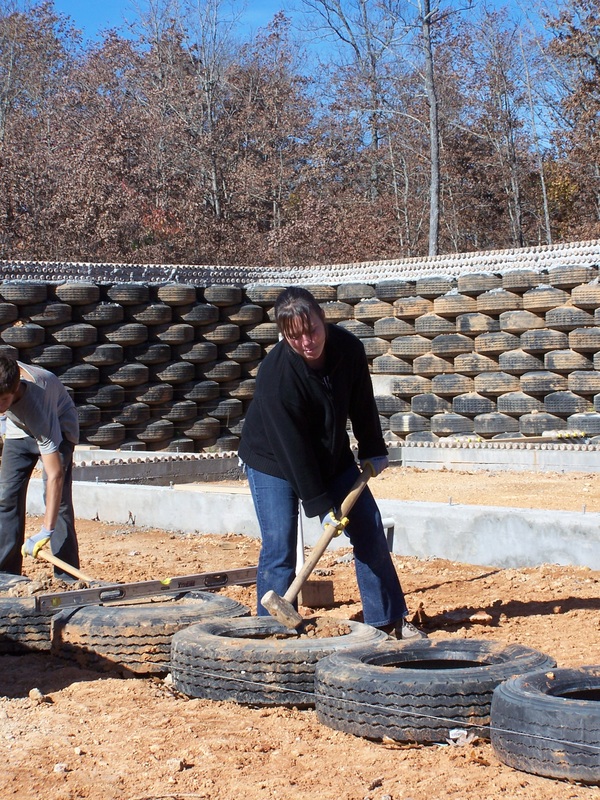 November 2014 was a very busy month for us. We had gotten a lot done. We had poured the forms for the interior walls and then promptly after started leveling the ground for the greenhouse tires. Our friend Joy came out to give a helping hand. Joy was so grateful in getting her tire completed that for her victory pose she decided to hug her tire. 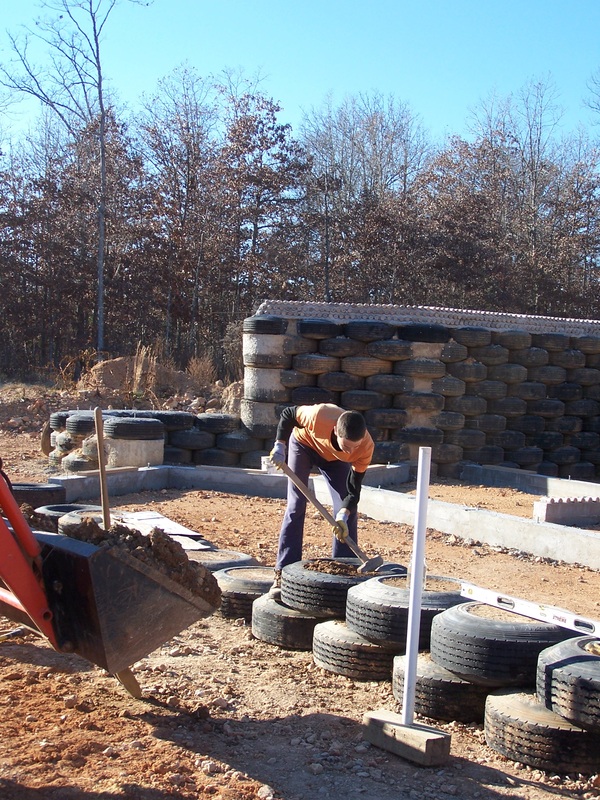 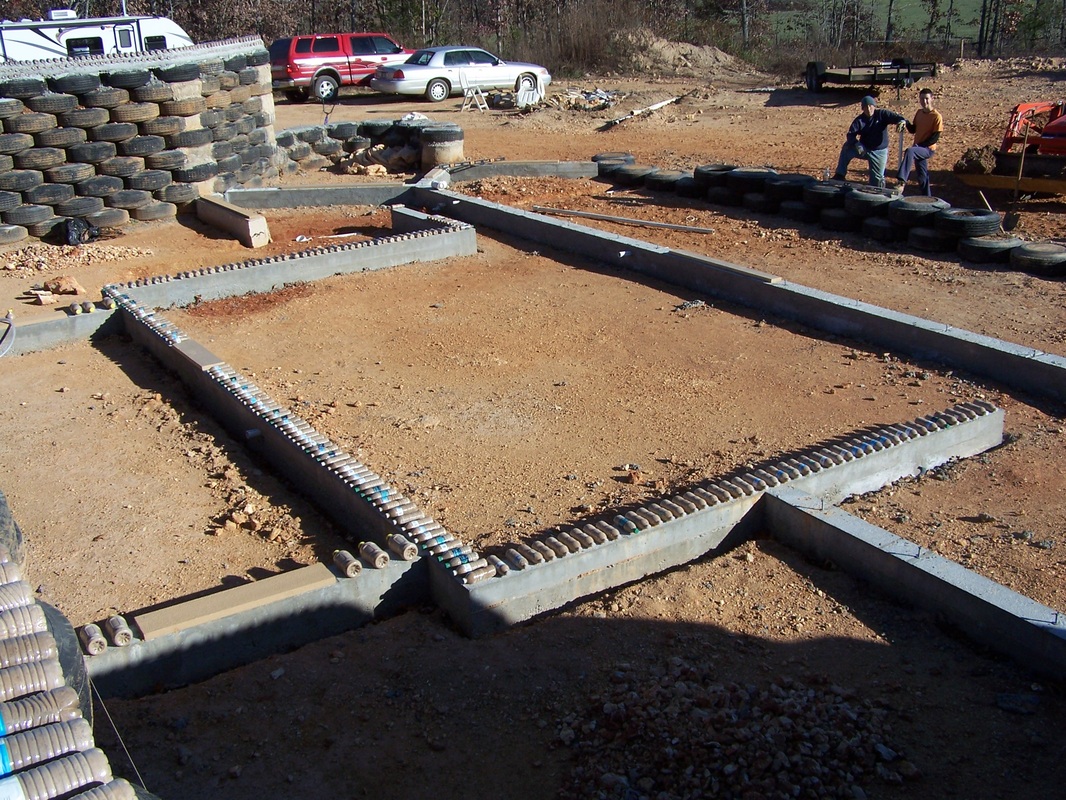 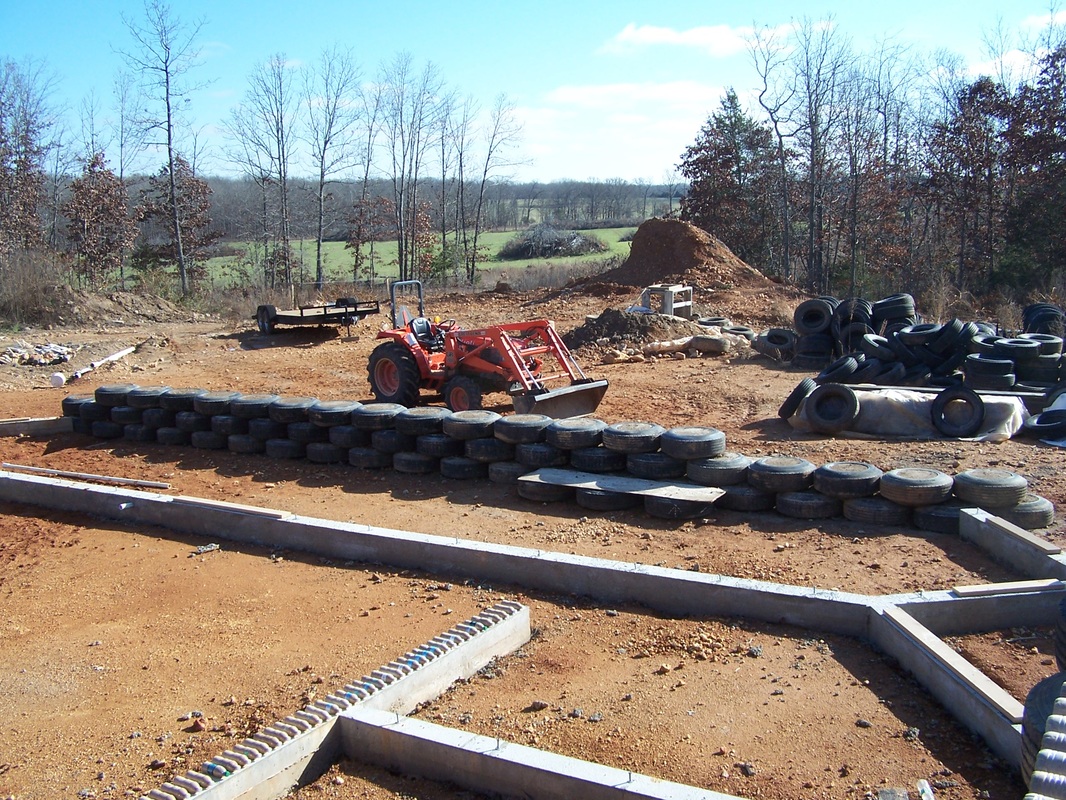 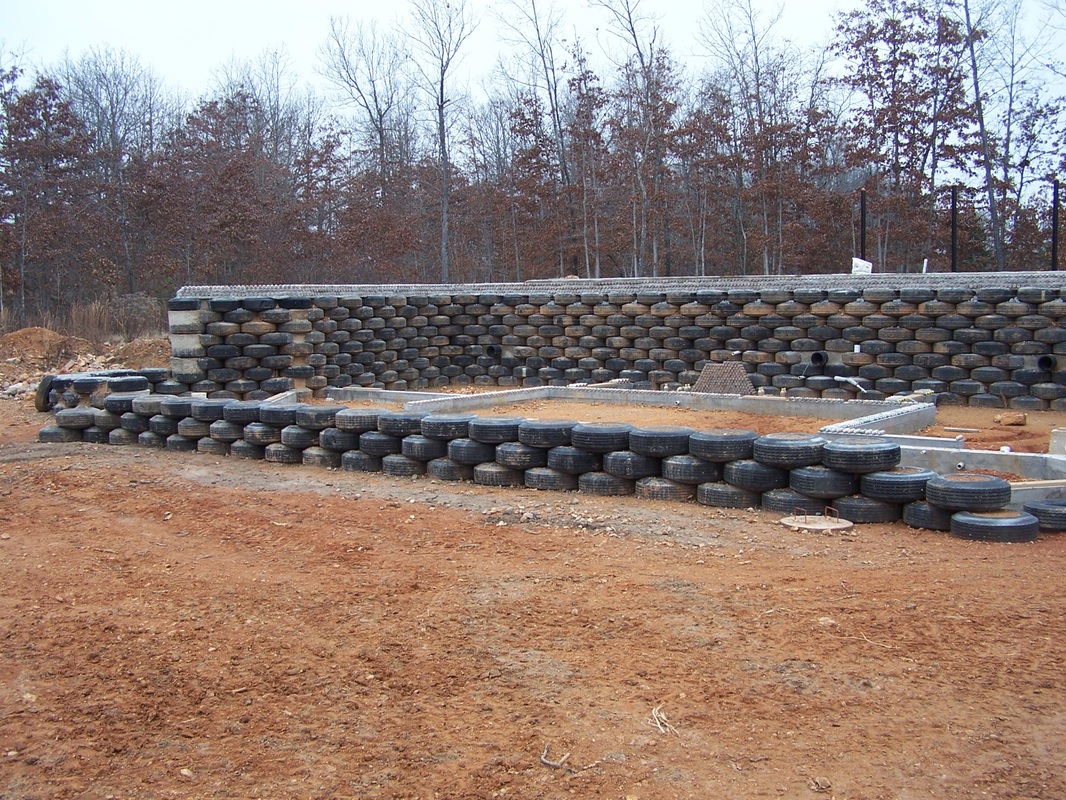 Allen and Arron had pounded 60 tires for the greenhouse wall. This brings us to a total of 575 tires used for the Earthship. We had to wait until January 2015 to pour the papercrete needed to support the two corner tires. 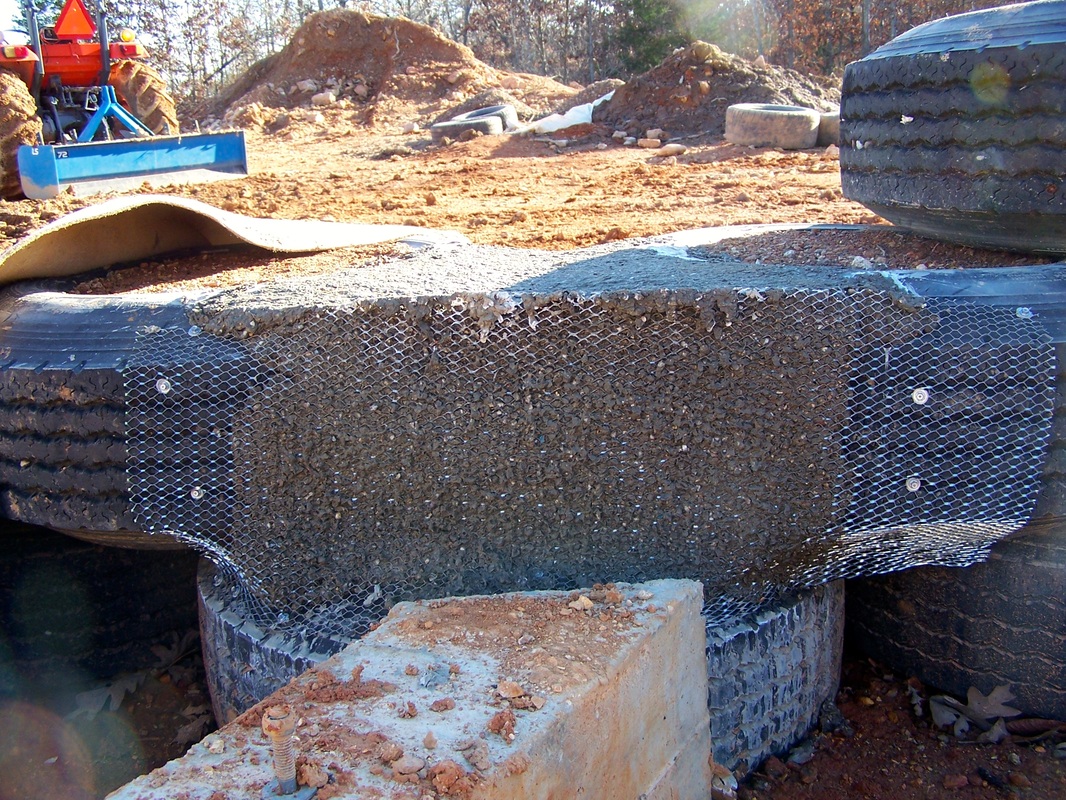 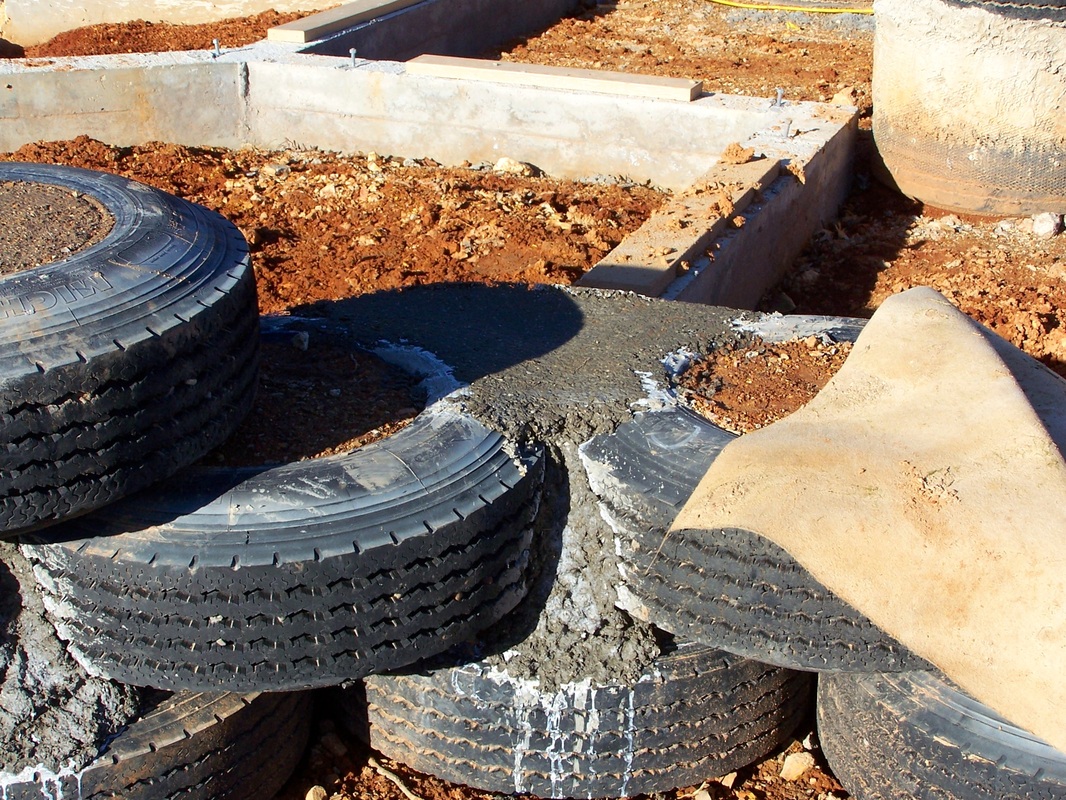 It has been raining a lot this winter that it gets all of our dirt wet. Once we dry out really well we will have dirt to pound the last two tires for the greenhouse. The next step for the exterior greenhouse wall will be to dig out the dirt in the middle of the tires and pour with cement with a J bolt added. The J bolt will be used to fasten down the wooded plates to the tires for the framed in glass wall. Bond Beam and Water Bottles Going back to November for a moment. We had used up all the compacted bottles we had for the bond beam. We still had 1 and 1/4 rows to finish which means 415 bottles left to compact. We did this when we had that week of arctic cold weather. In December we had nice enough weather that we finished laying down the rest of the bottles needed for the form and were able to get the top coat of the bond beam done as well. We had used 2, 370 compacted plastic water bottles for the completion of the bond beam. The next step was waiting for a 3 day window of the perfect weather to finish and pour the middle of the form with cement. While we were waiting we have been compacting water bottles in our camper. 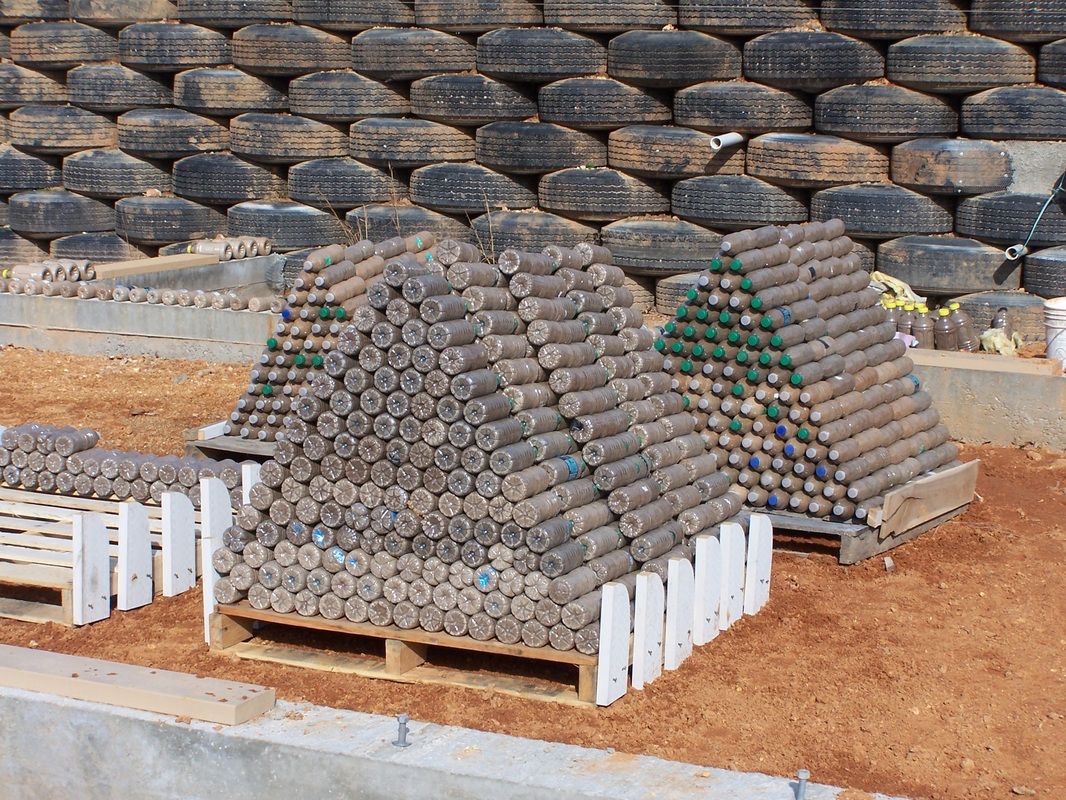 We have compacted over 1632 water bottles thus far with the help of some friends named Doc and Joanne Furbee. Including the bottles that are already on the footing we now have enough bottles to lay down 9 rows for the Kitchen and LivingRoom. This will give us 3 feet of wall height. Because we are using cement motar to fasten in the bottles with we need to wait for the weather to be above freezing at night for 3 days in a row. This is the same reason why it has taken so long to complete the Bond Beam as well. The first 3 days are the most critical for cement. Bond Beam CompletedThe 3 day window for pouring the bond beam finally arrived and we took advantage of it. February 7th, 8th, & 9th had the temperatures we were looking for. We are grateful for the extra cement mixer that Jim had brought that day. It made the work go so much faster. Especially when we had extra workers available to mix the cement even faster. In Michael Reynolds ebook he suggests to make the cement mixture a stronger mix. We decided to do this since it is a vital part of the roofing system. We used 94 pound portland cement, trucked in cement sand and aggregate from on site. When it was all said and done we had used 22 1/2 bags of cement to finish the task. 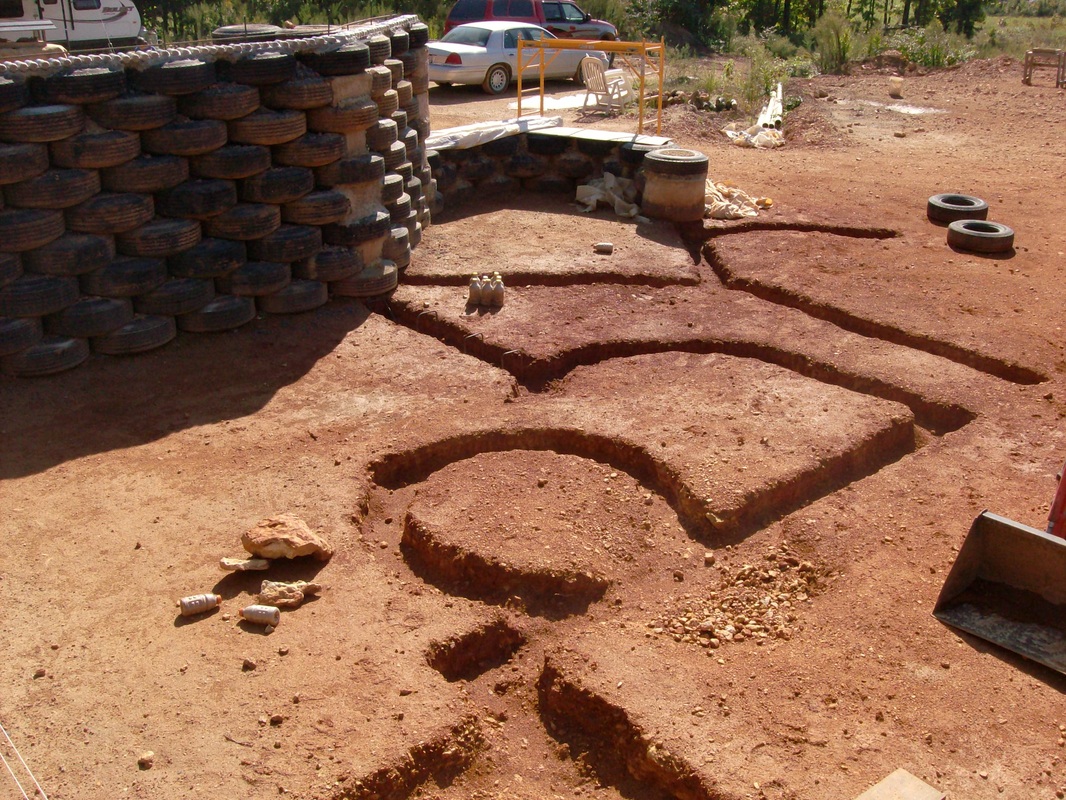 EarthShips are unique as they don't have a basement and they don't use a slab for their foundations. Our tires are 30 inches in diameter so for the outside walls the tires themselves are the foundation. The interior walls need a foundation to work off of to construct them. Most EarthShips use the ground itself. They did a trench and pour the cement right into the trench using the ground itself to level. With our rocky ground that is not level we had to come up with a different solution. 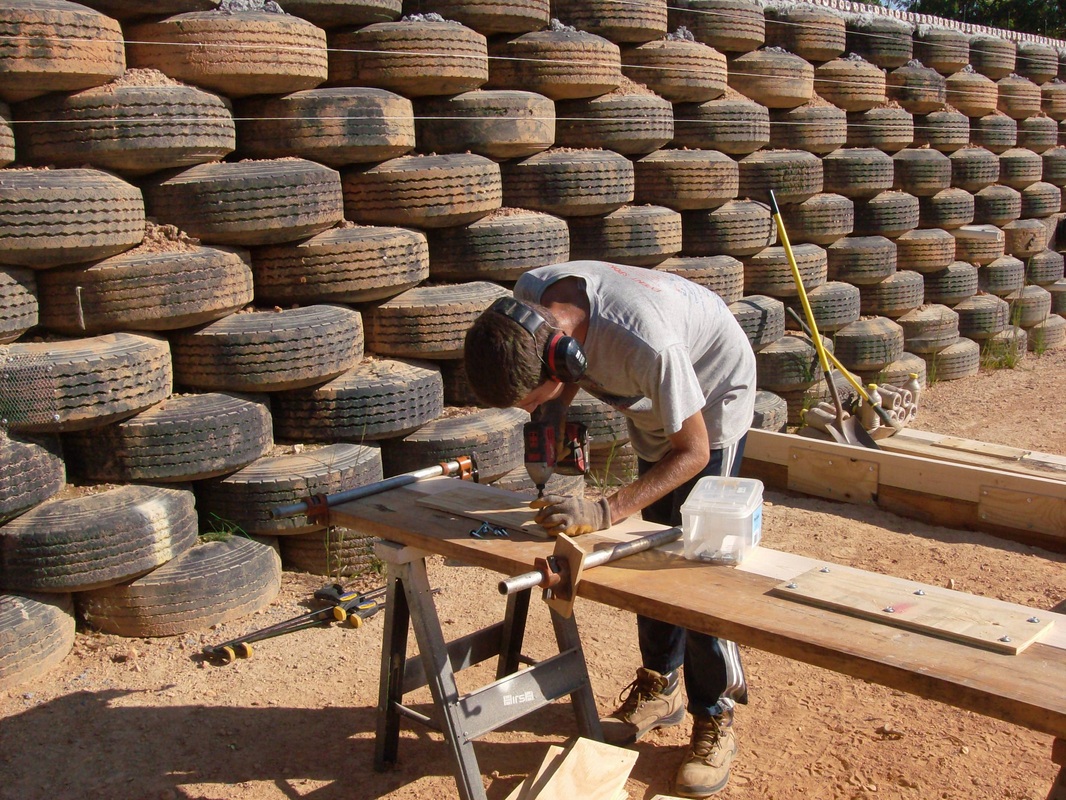 We had to make forms. This is Arron screwing together a 2 x 10 and a 2 x 6 to make a 15 inch deep form. 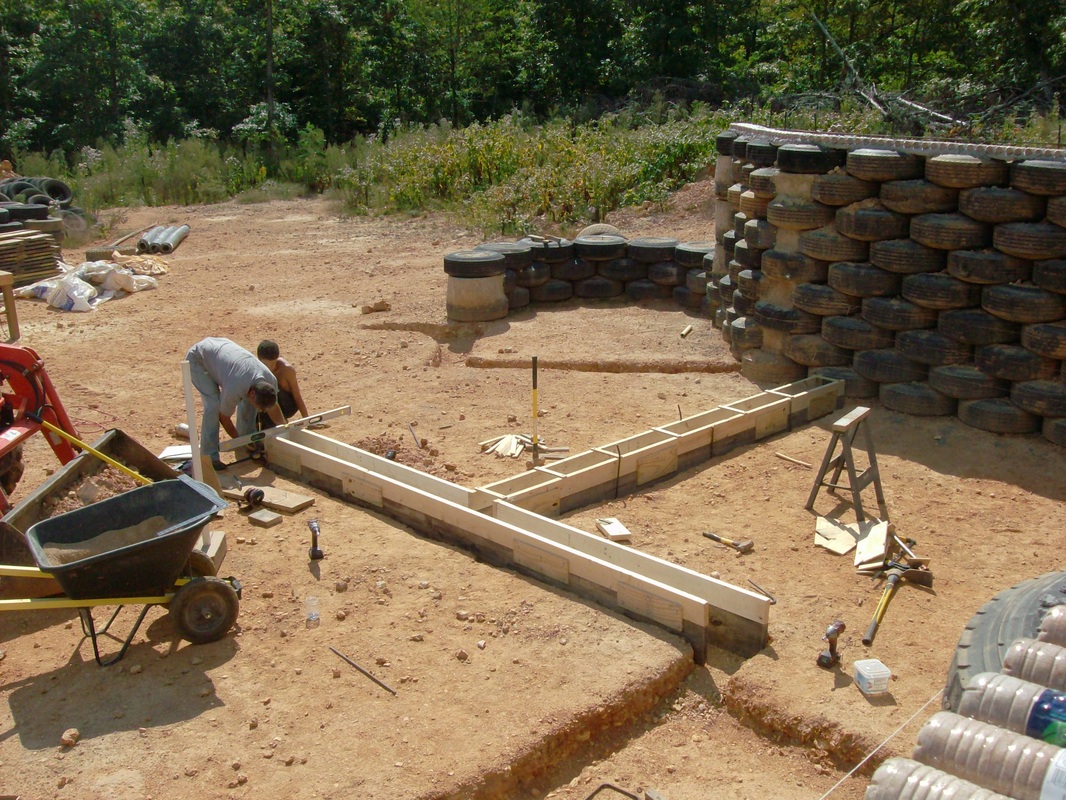 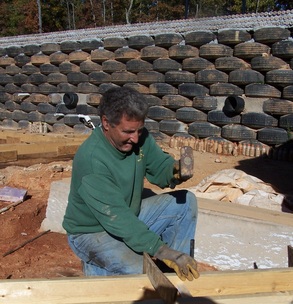 We are no experts in making forms at all. We have never done this for footings. This was more challenging than we thought it would be to do. We are working with rocky ground so to level the forms was a challenge. We had to purchase nail stakes to help with this and to help keep the forms in place when pouring the cement. The other challenge was to make sure that they were straight and square. Going off round tires didn't make it any easier. And the third challenge was to make them all the same height. Using a laser level helped with this greatly. Especially since the West side of the EarthShip is higher then the East. 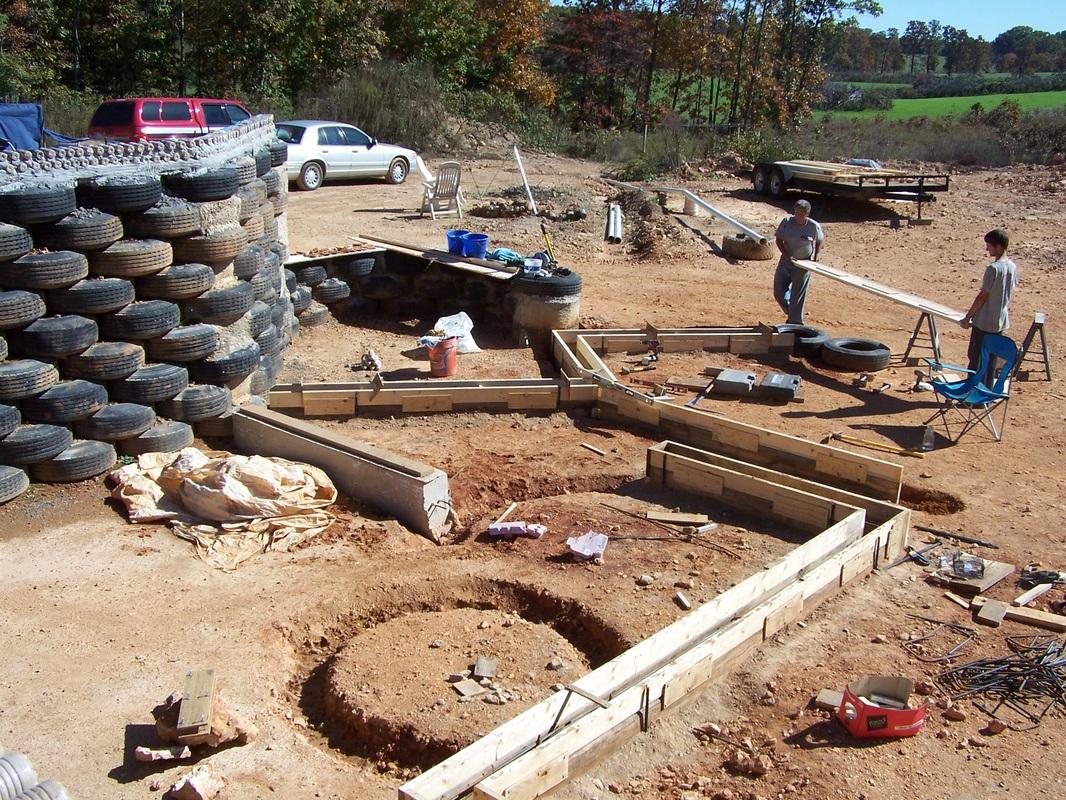 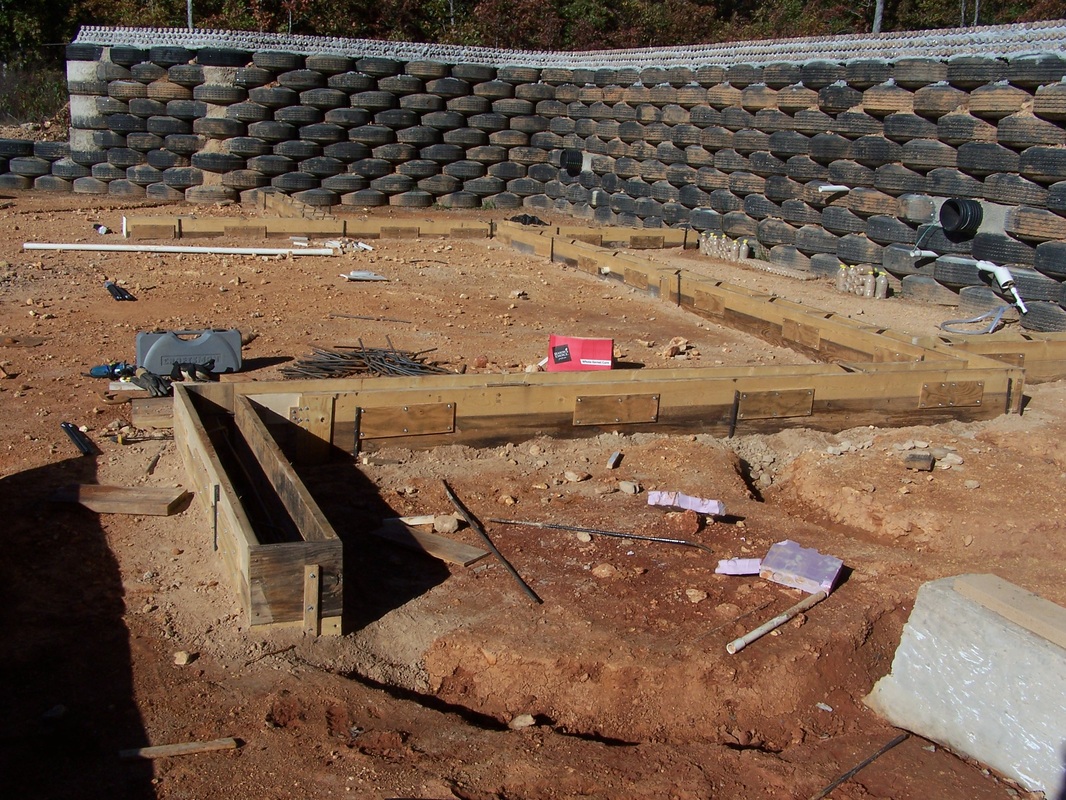 Once the forms were in place next was to add the pipes and the rebar. We had to figure out where to place our pipes for the grey water system and the septic. The grey water from the laundry, sinks and shower will all go into the planters. Since we have huge planters we have decided to place the pipes in different locations to make sure that all the planters will have a water supply going into them. Since the pipes will go through the cement footings we had to drill holes in the forms and place the pipes in the locations needed. This took a great deal of thought. And we had to be sure that we didn't forget anything once we poured the cement it would be too late. The bottom half of the rebar was added then the pipes put into place then the top half of the rebar to finish. 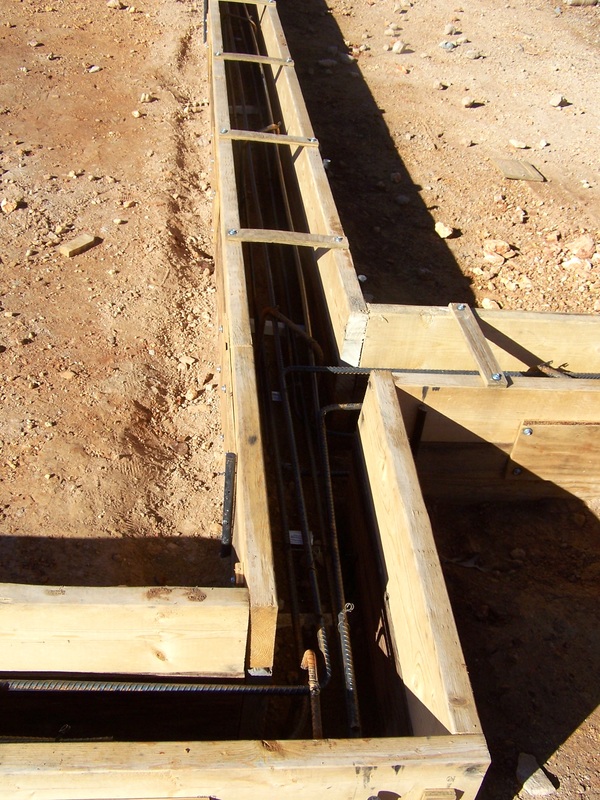 When our neighbor that is an engineer came over to see how we were doing he said, " I have never seen a bridge inside a house before." Meaning we had more than enough rebar in place. 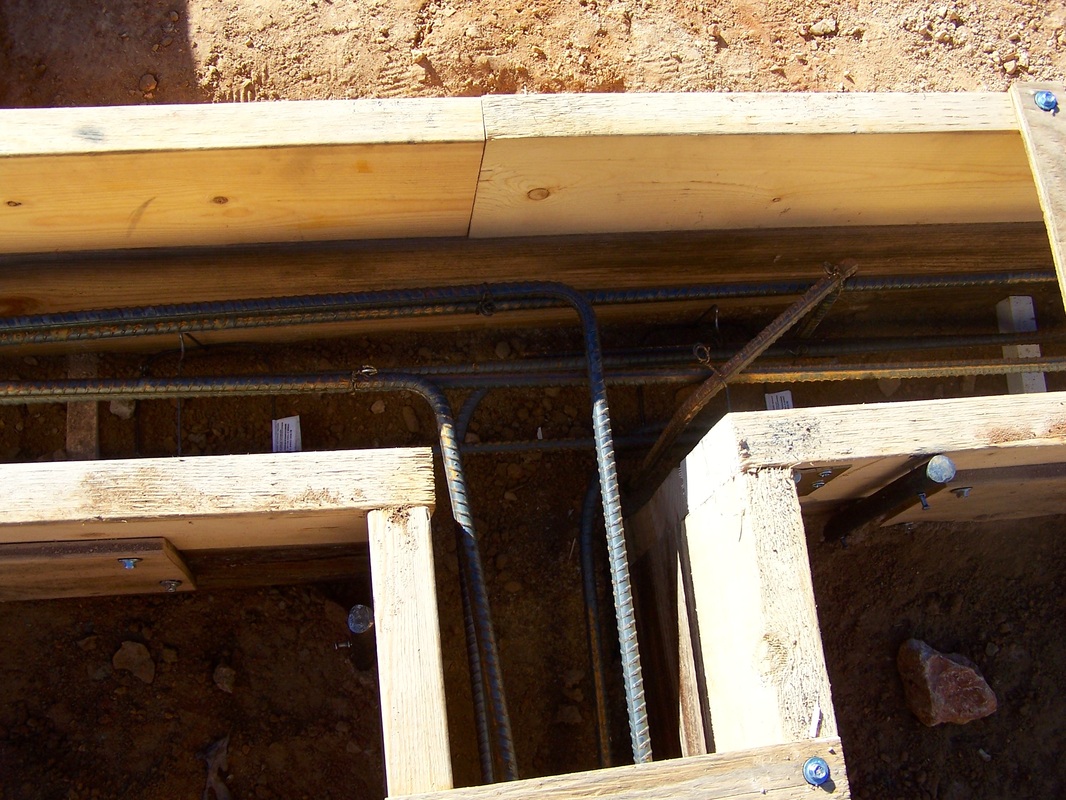  Next was to get the bottom plate for the doors ready to go. They had to be cut to length, painted and porcupined with nails so it would stick into the cement. When all was ready to go then it was time to pour the cement. We knew we would not be able to do it all ourselves with one cement mixer. Using a cement ruler we estimated that it would take 6 and a half yards to complete the task. We had to order a truck. 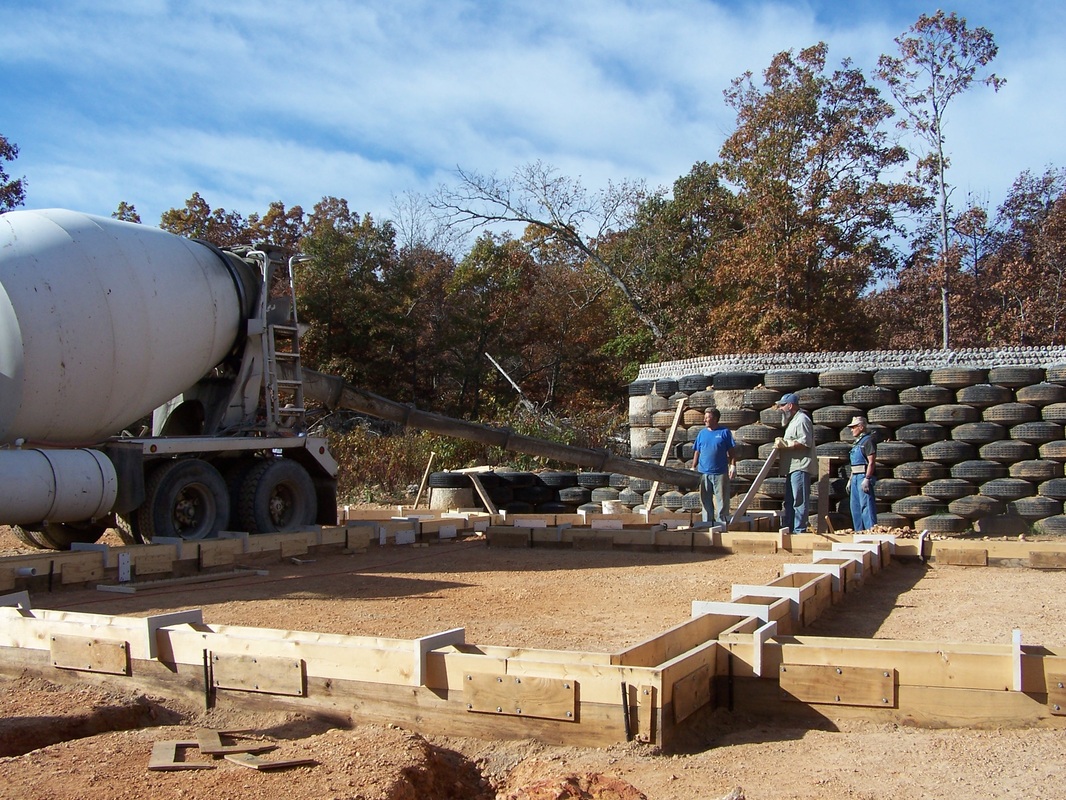 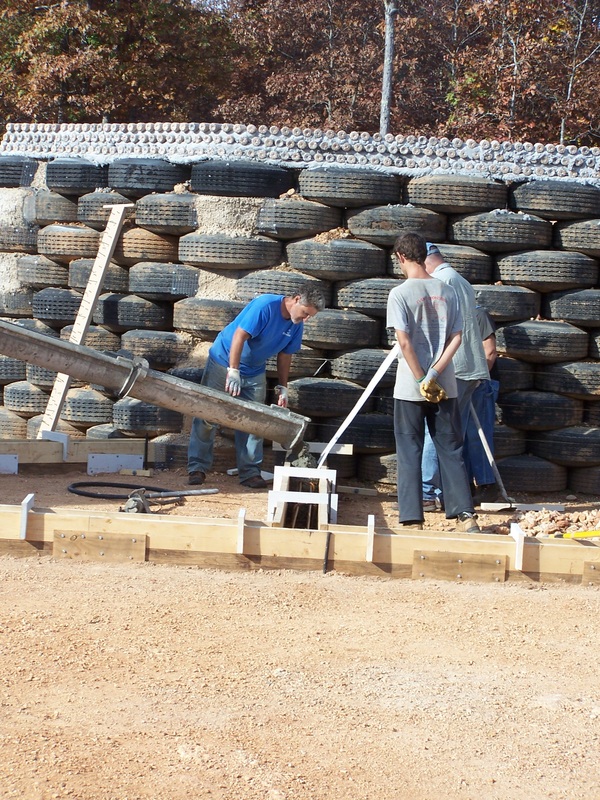   Helping with the cement that day was Corey, Arron, Robert and Allen. 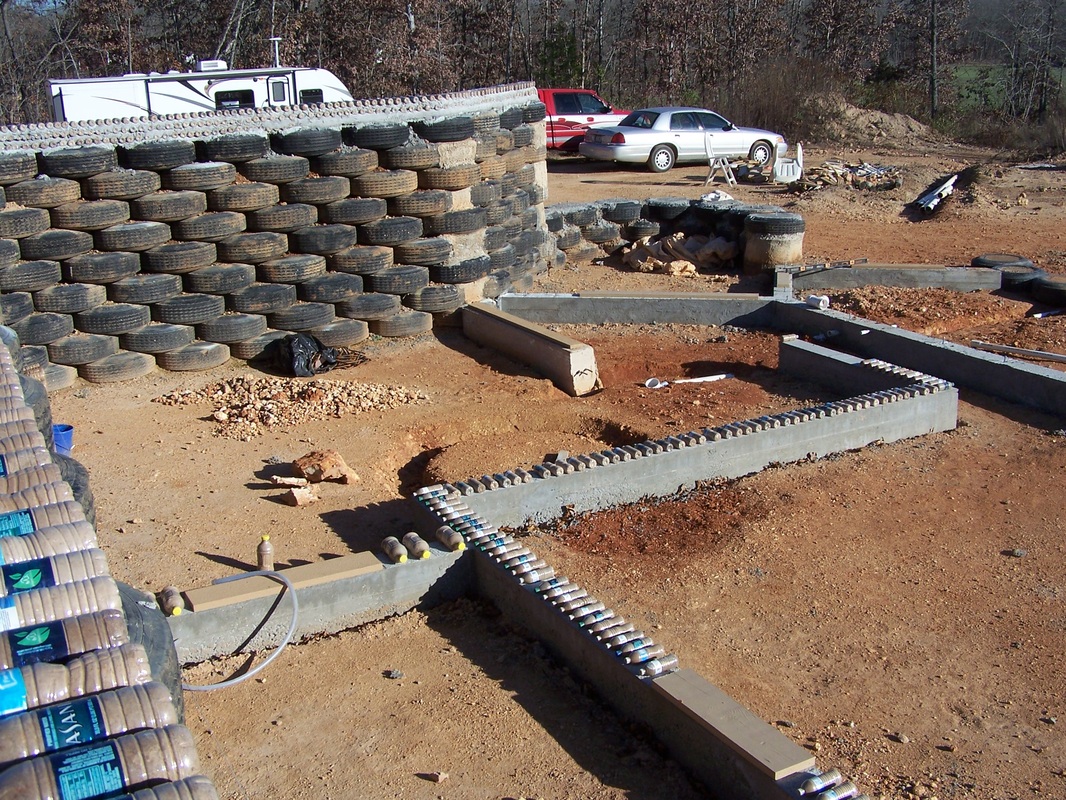 The finished product with the forms removed.  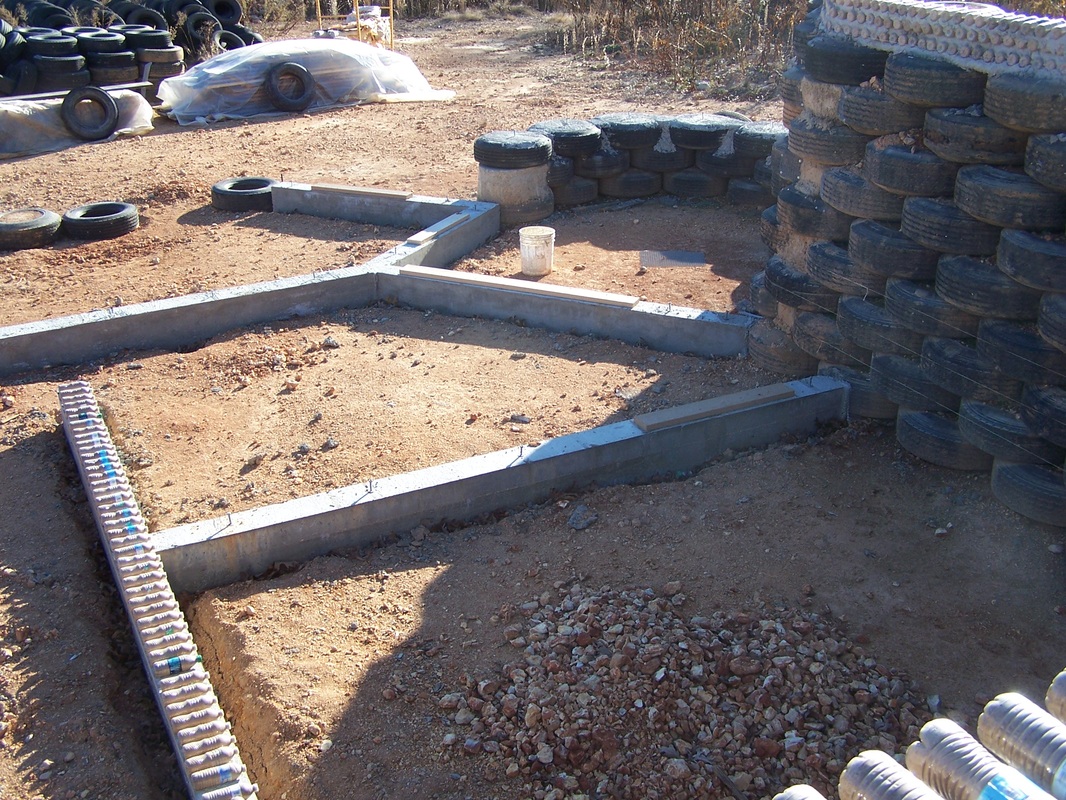 All in all this project took about 2 months to complete. This took longer than what we expected it would. Even though all of this work will end up being buried with gravel and floor, foundations are important to really get it done right. It is the surface to build the walls onto. It will make it so much easier to level and square up the walls because we took this time for the foundations.
|
AuthorMary Severin writes about her families embarkment on a learning adventure to build an Upcycled Home using Earthship Principals. To find out what these Principals are click on the Earthship Principals link above. 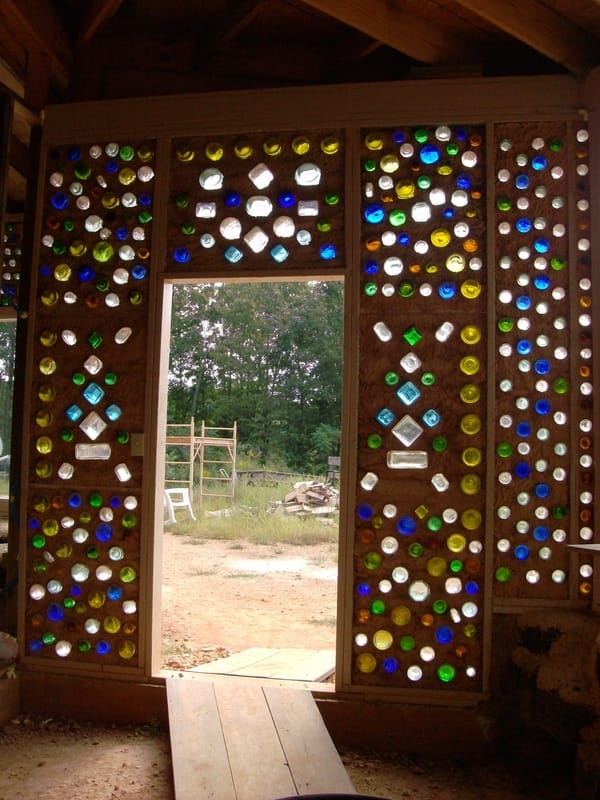

CategoriesArchives
March 2018
|
| Severins Upcycled Home |
|